Deploying Support Legs
Learn how to deploy the EDC elevation legs and optional bench with work surface configuration. This page provides complete instructions for both the EDC support legs and the bench articulating legs.
Overview
The EDC hardcase includes two lids, each housing a distinct set of legs:
- Lid 1: EDC Articulating Legs (for elevating the data center)
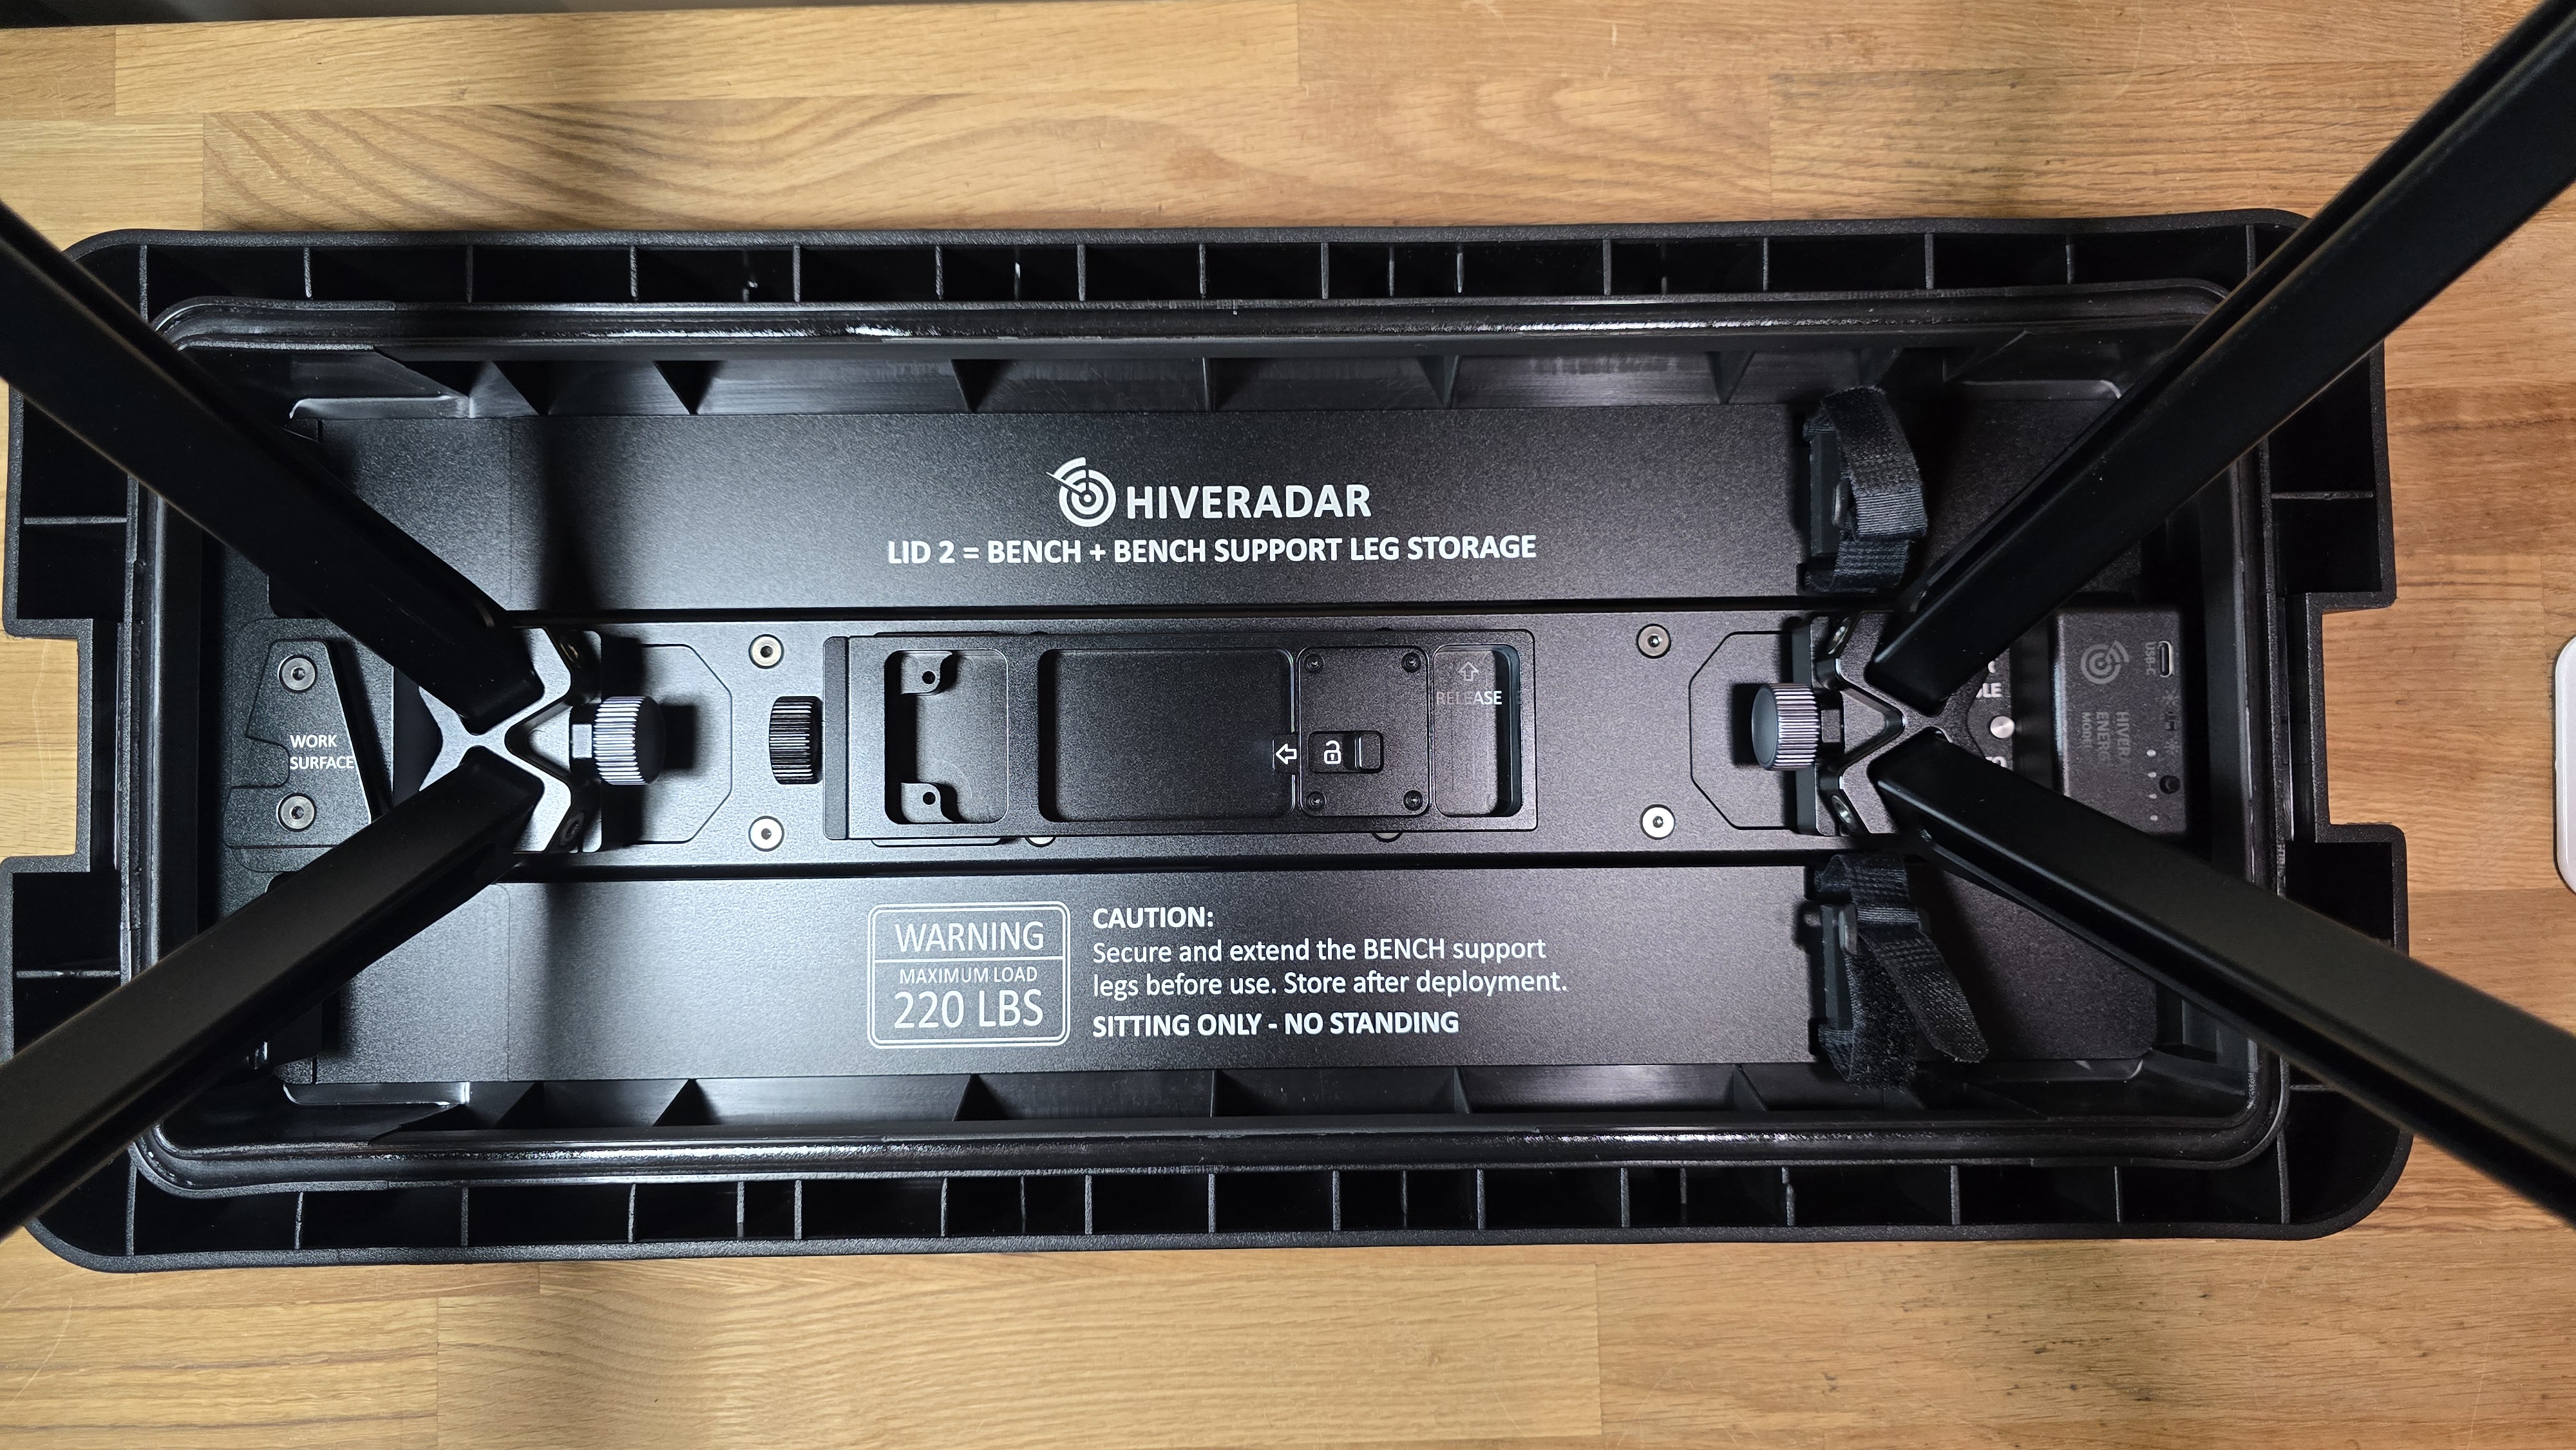
- Lid 2: Bench Articulating Legs (for converting the lid into a bench seat)
⚠️ Important: These leg sets are NOT interchangeable. Each serves a unique purpose.
1. Identifying the Legs
A. EDC Articulating Legs (Lid 1)
Purpose: Elevate the data center by attaching directly to the anchor points on the main hardcase.
Identification:
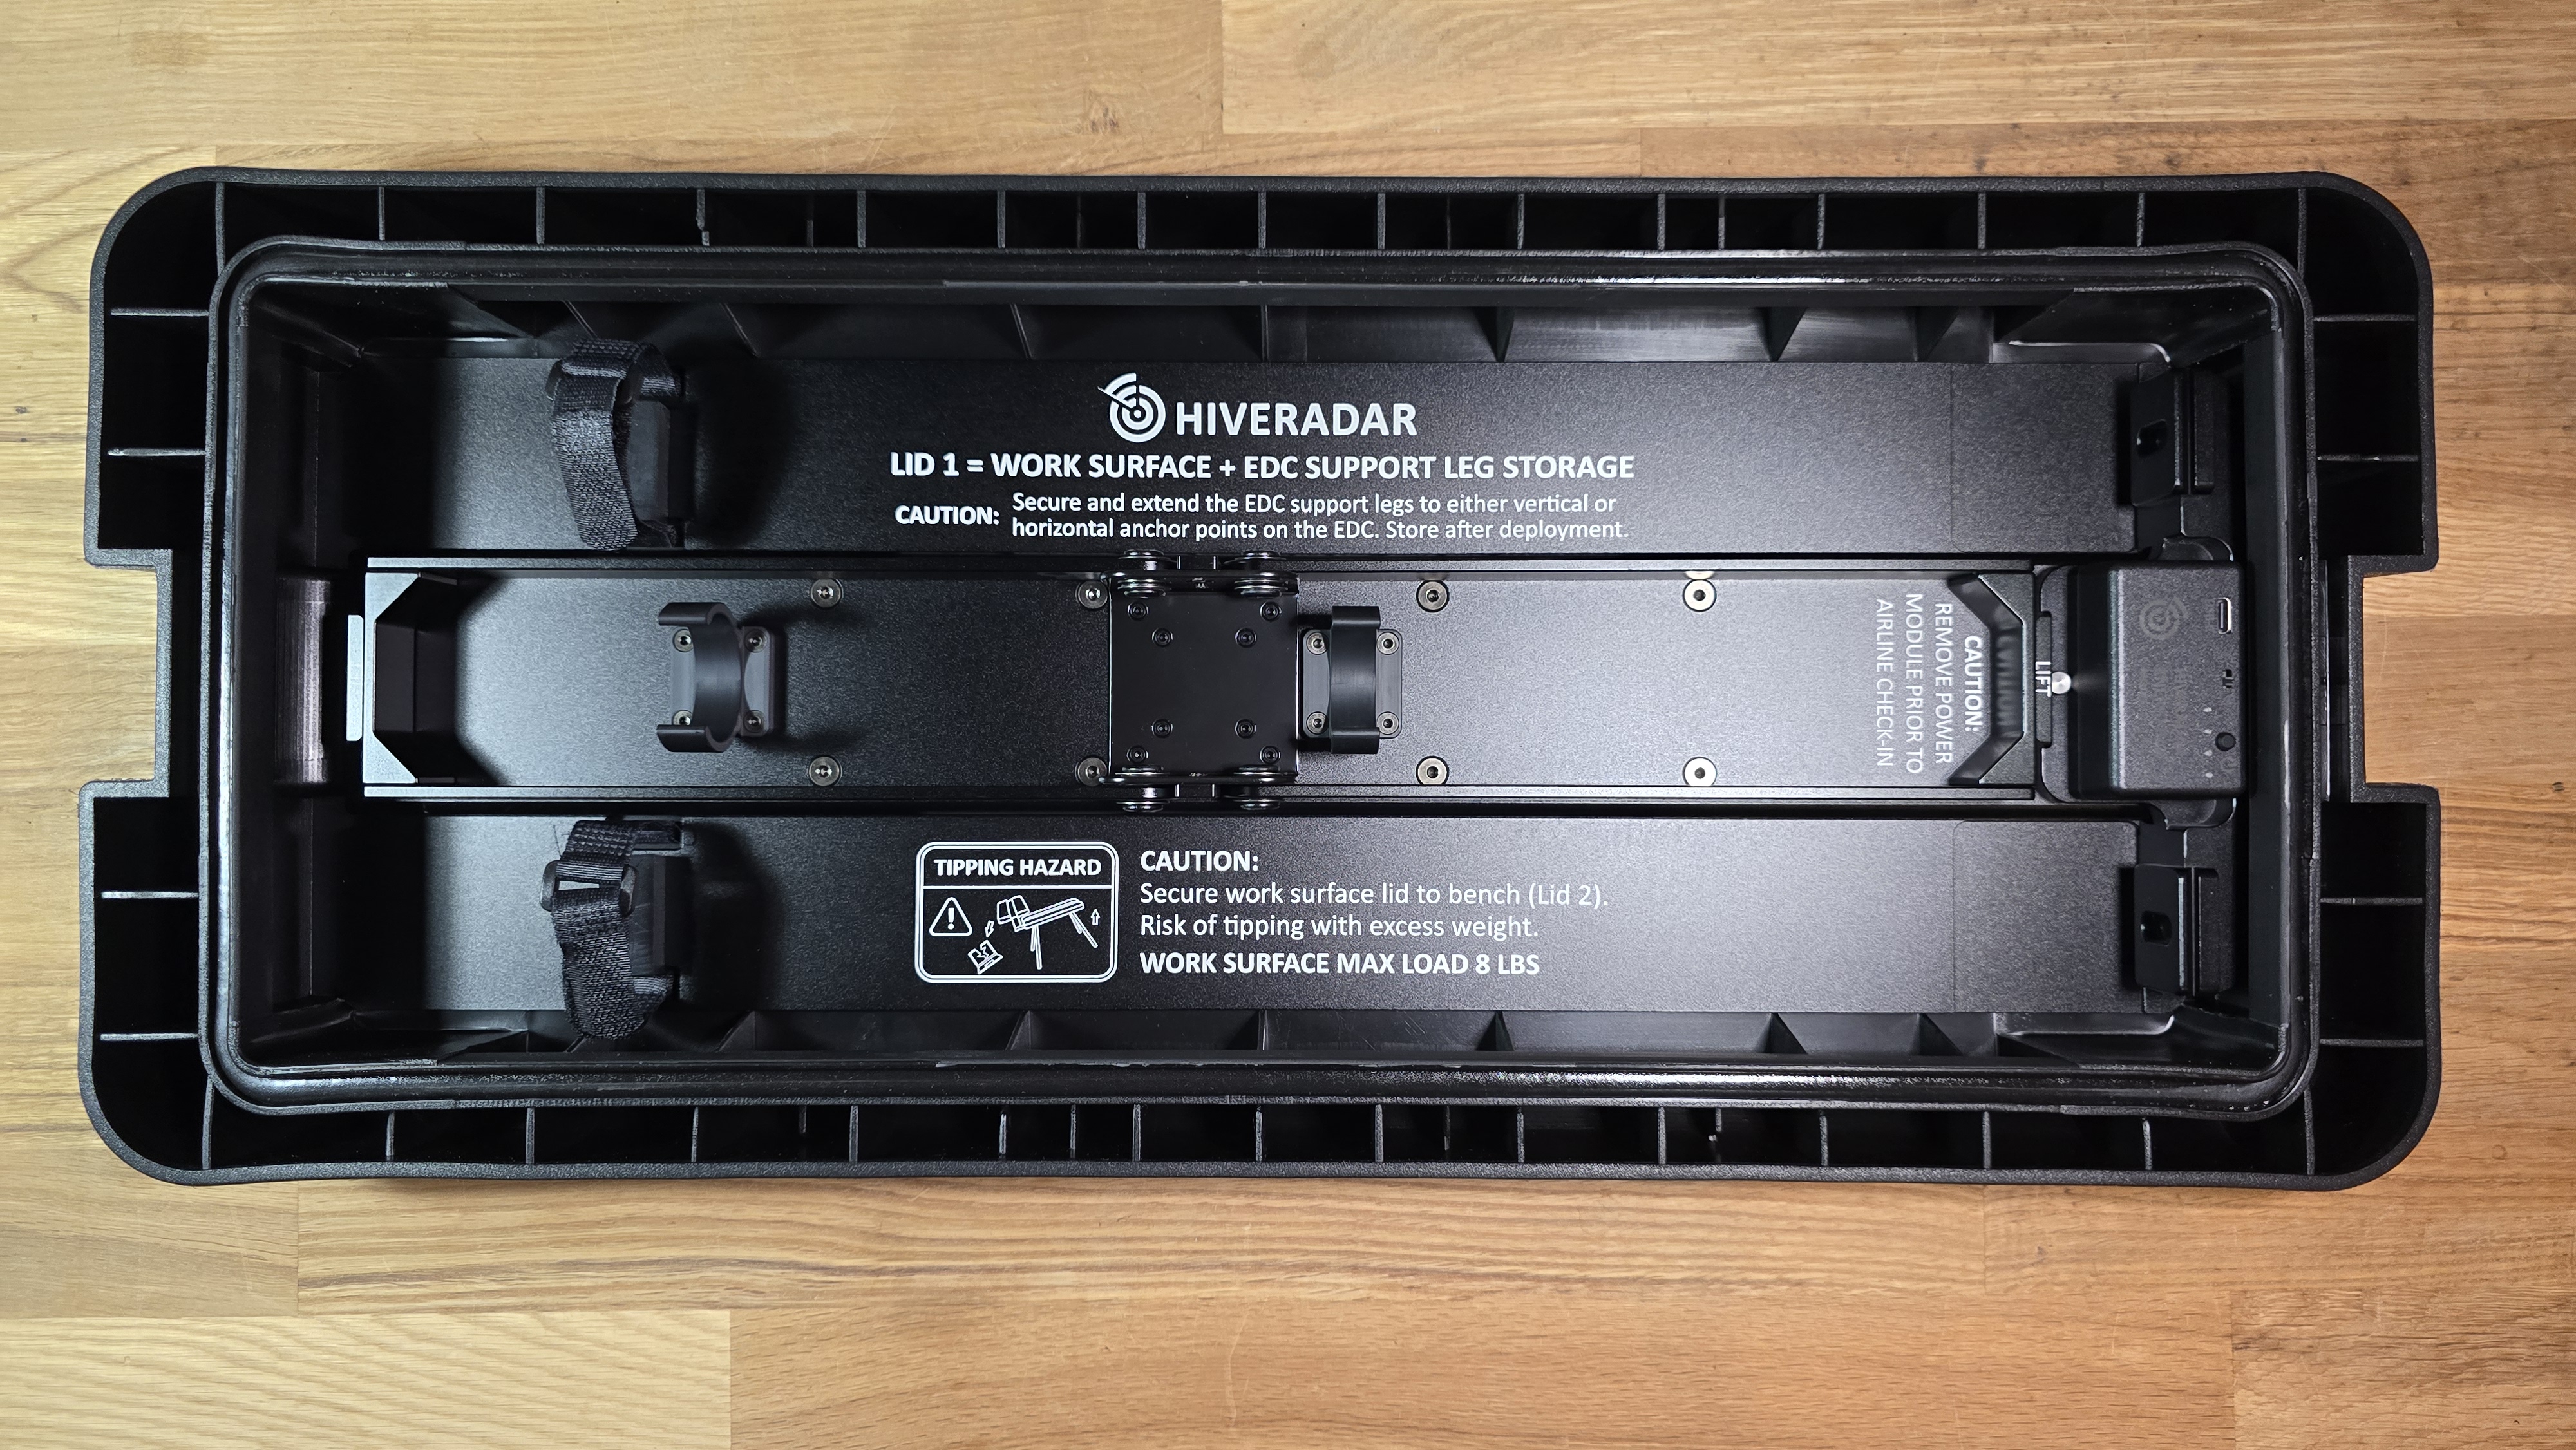
- Look for the icon marked "EDC" on the leg assembly (see Image below)
- Reference the text labeling on the inside of Lid 1
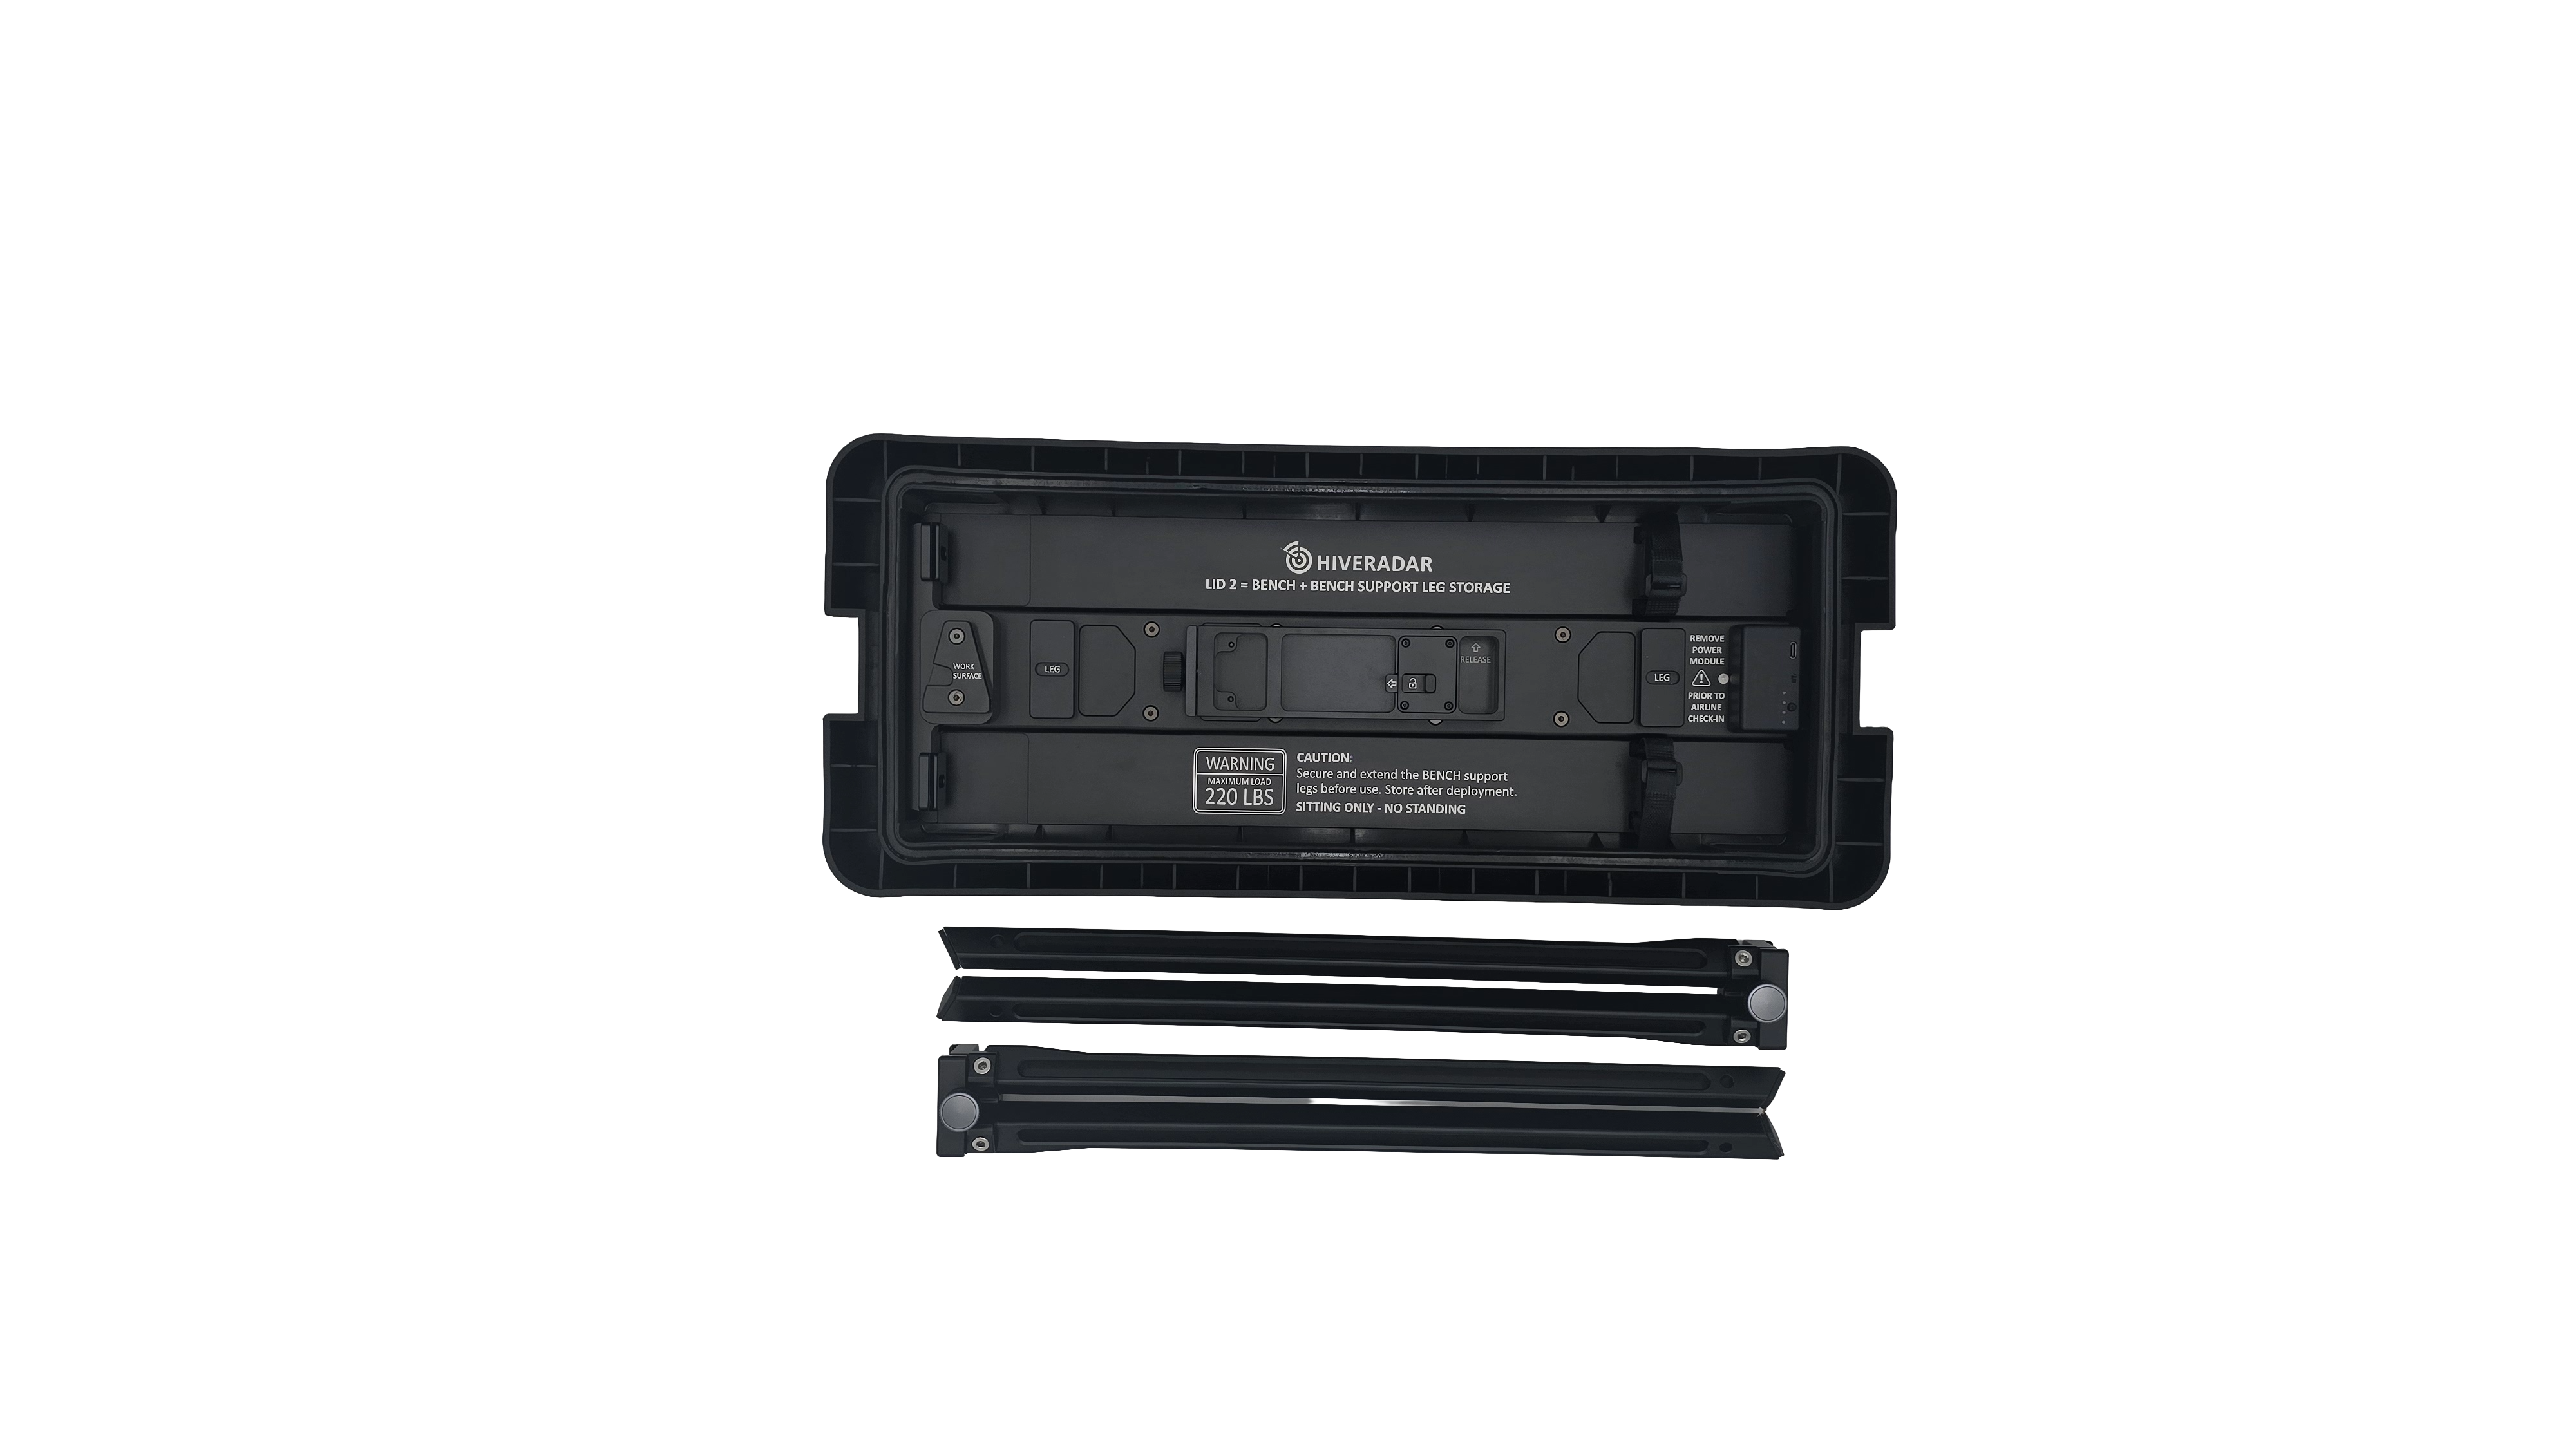
B. Bench Articulating Legs (Lid 2)
Purpose: Convert Lid 2 into a bench, with the second lid serving as the work surface.
Identification:
- Look for the icon marked "BENCH" on the leg assembly (see image below)
- Refer to the text labeling on the inner side of Lid 2
See Using Lids as Work Surfaces for more detailed overview.
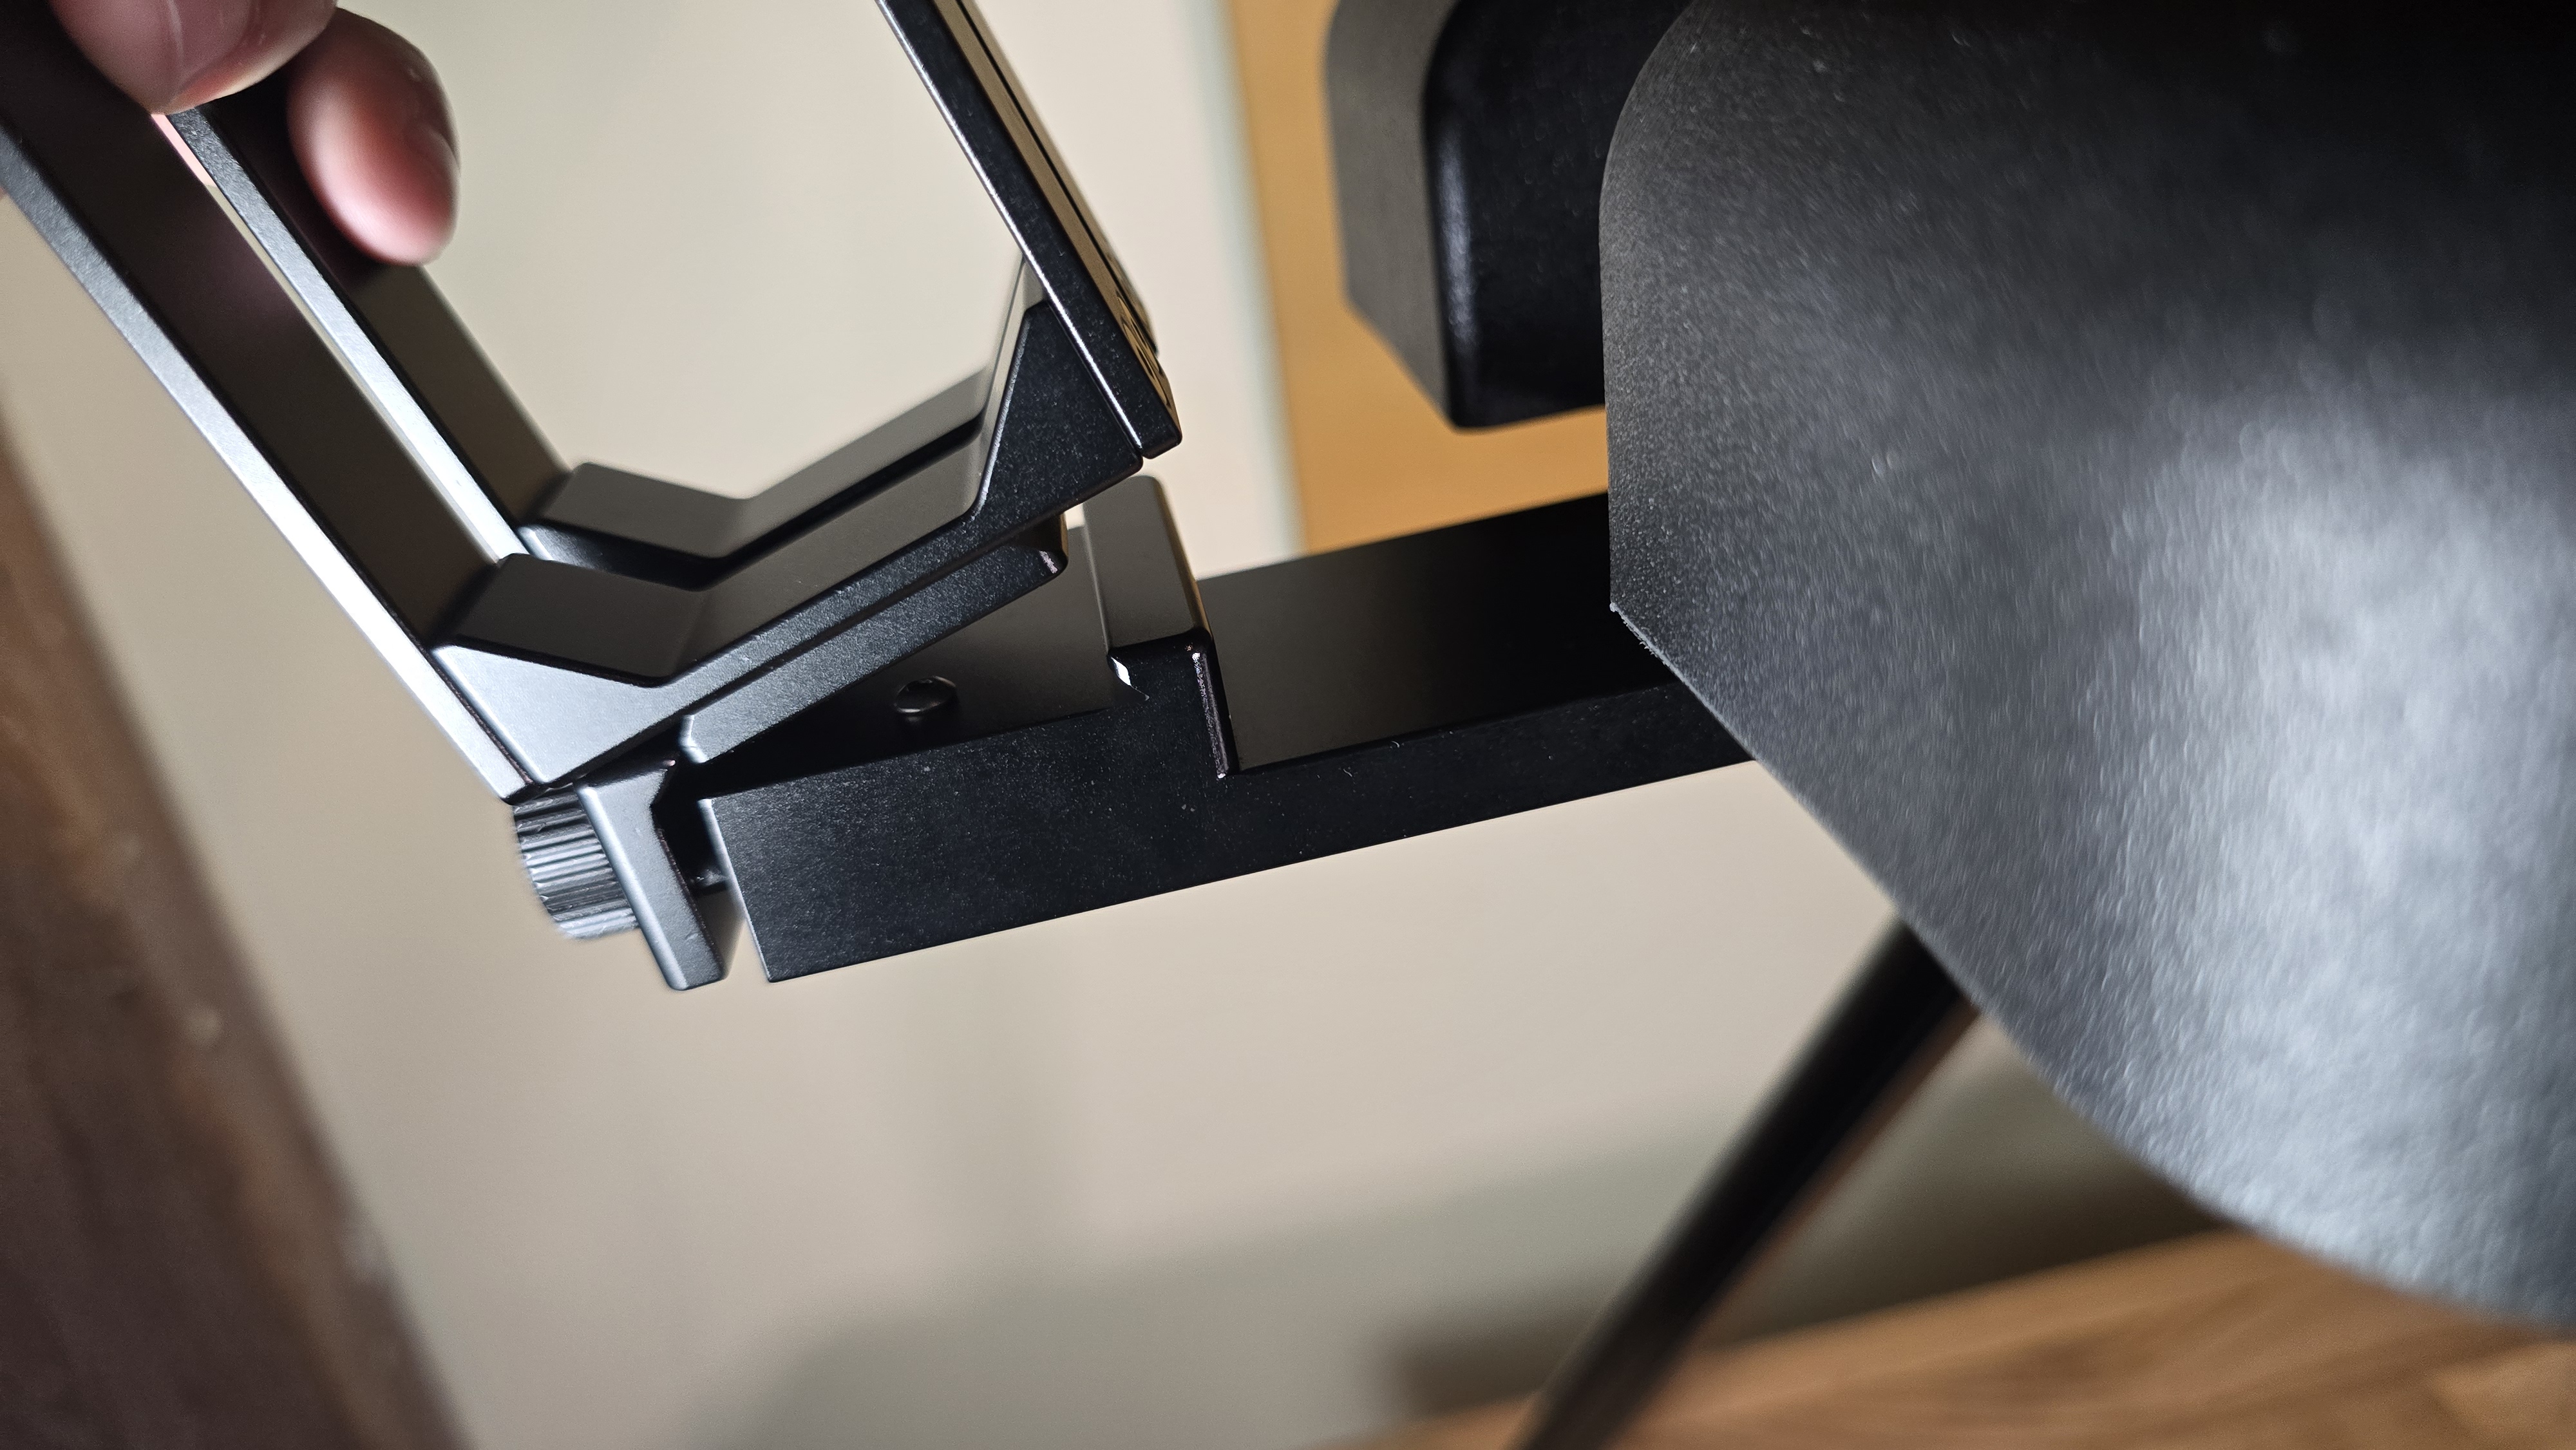
2. Deploying EDC Elevation Legs
Steps:
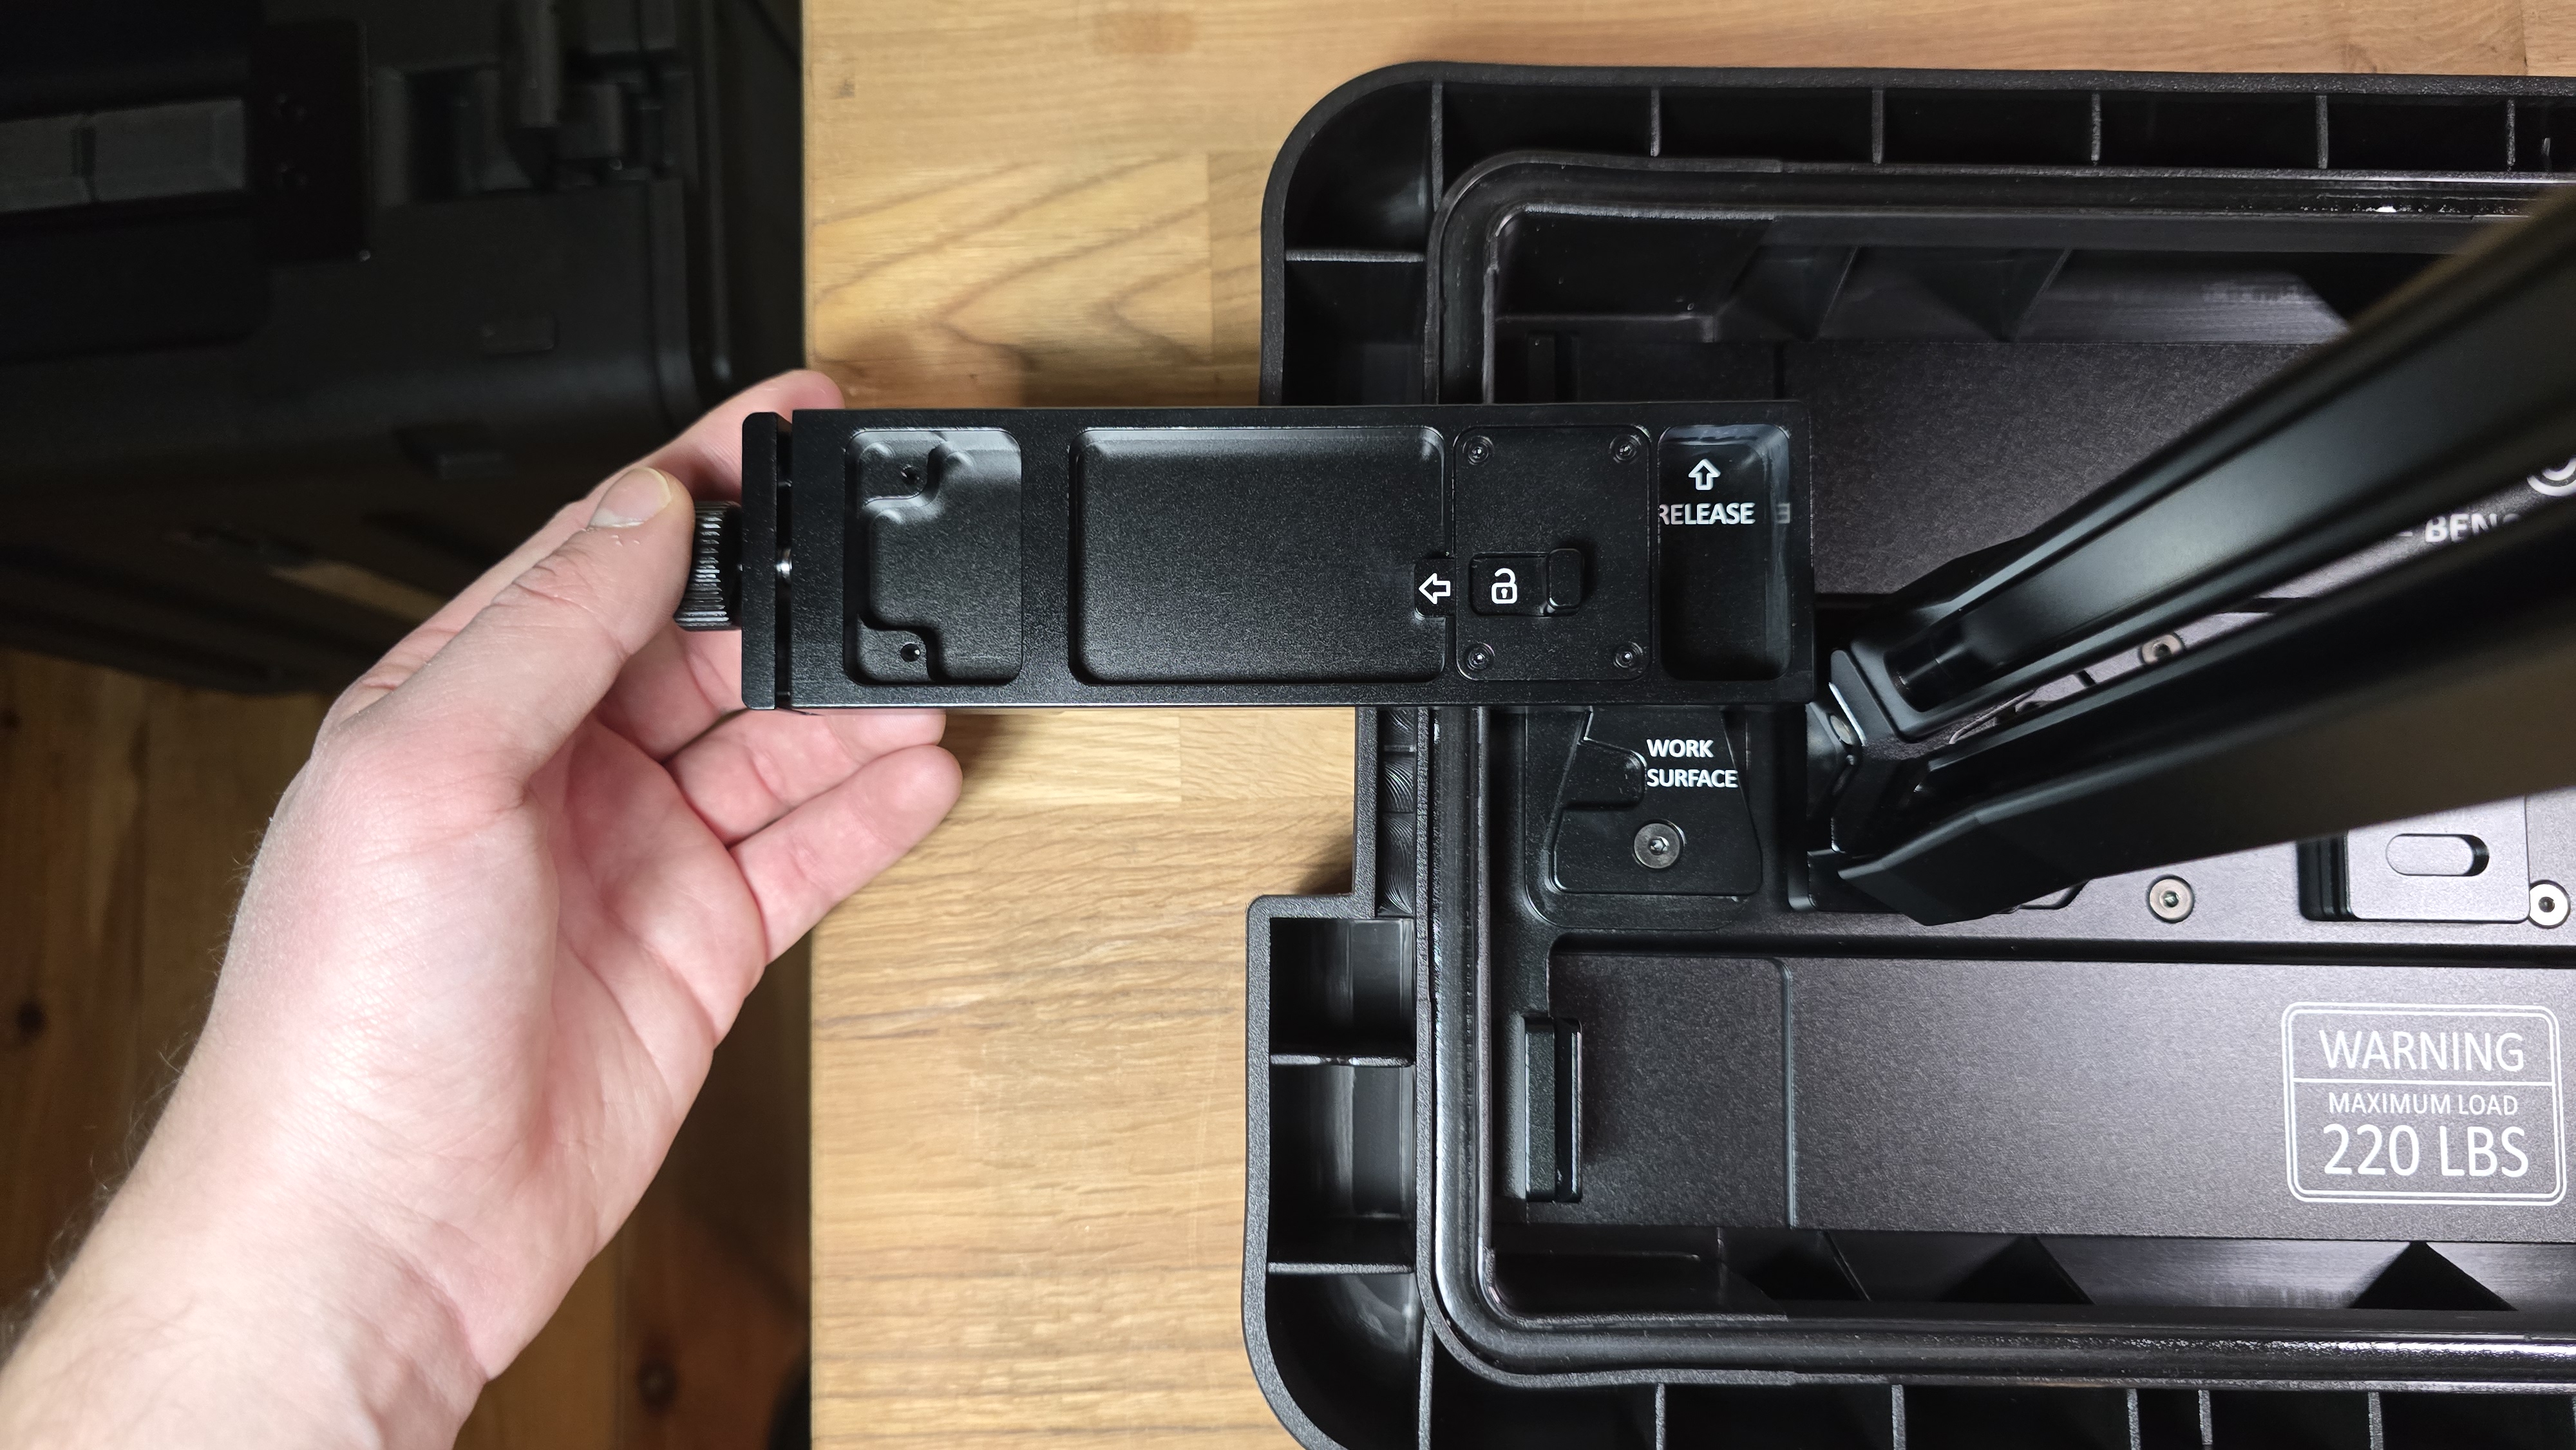
- Locate the anchor points on the bottom of the hardcase body
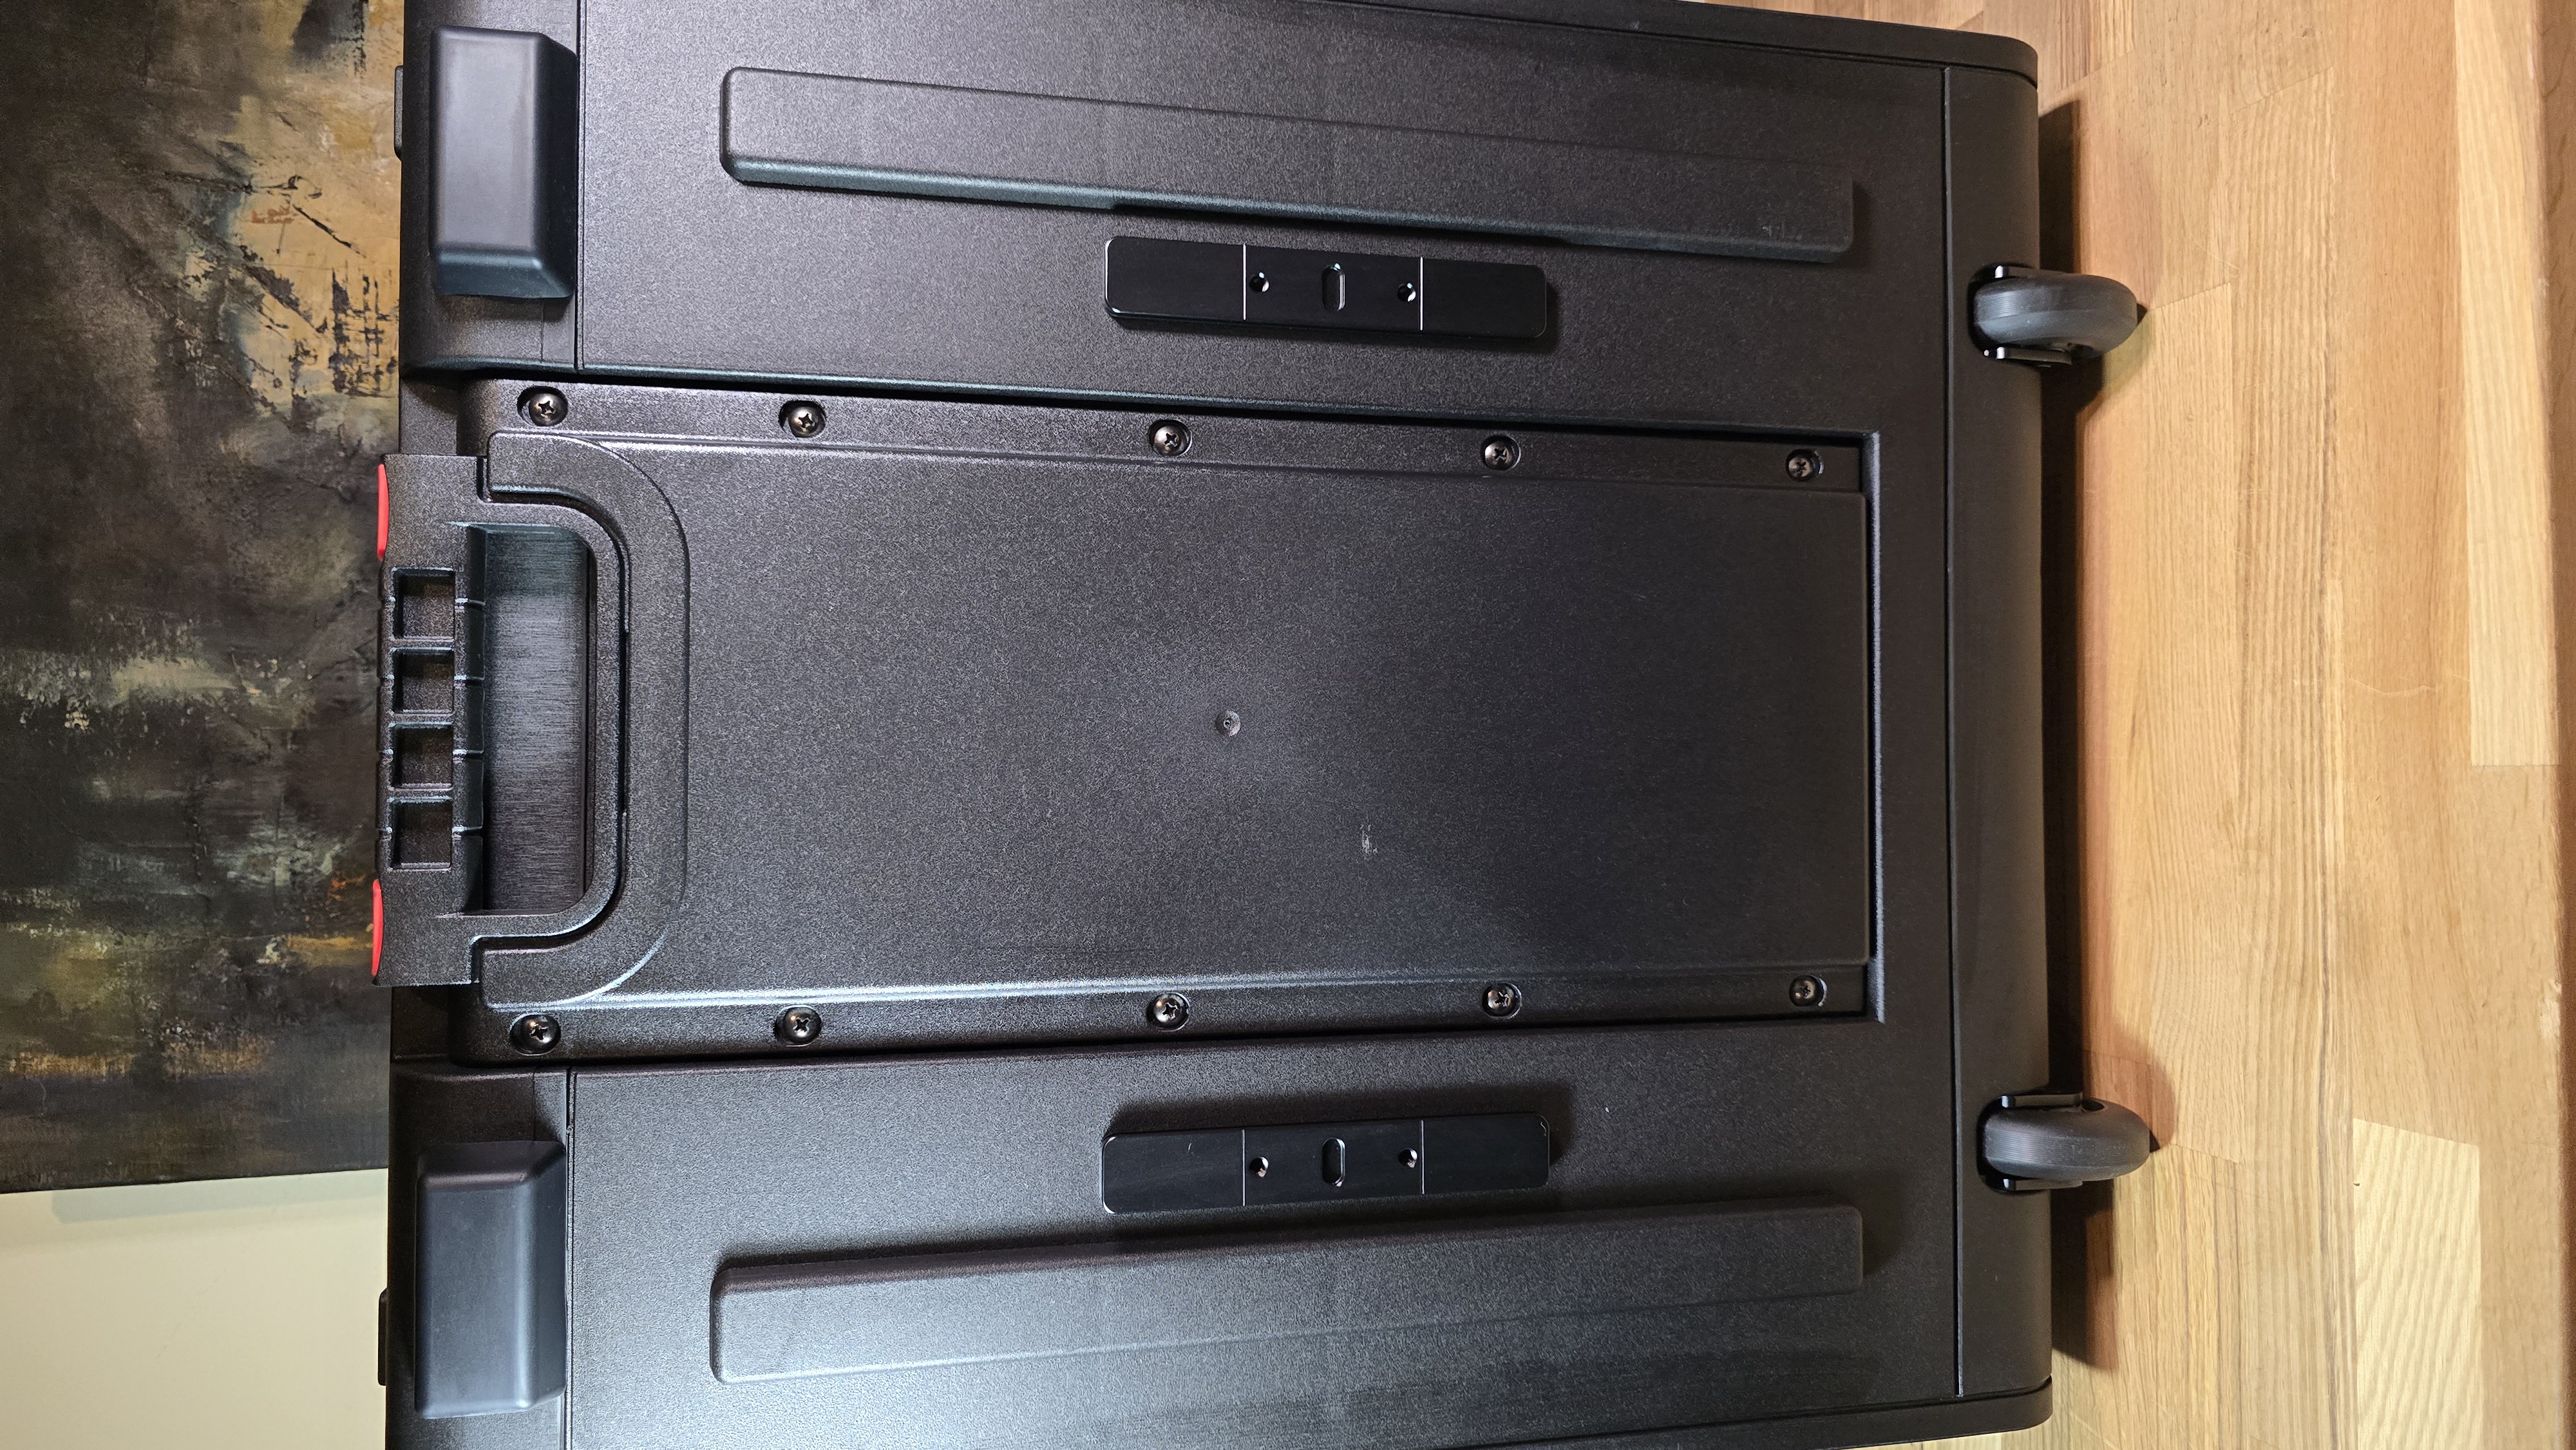
-
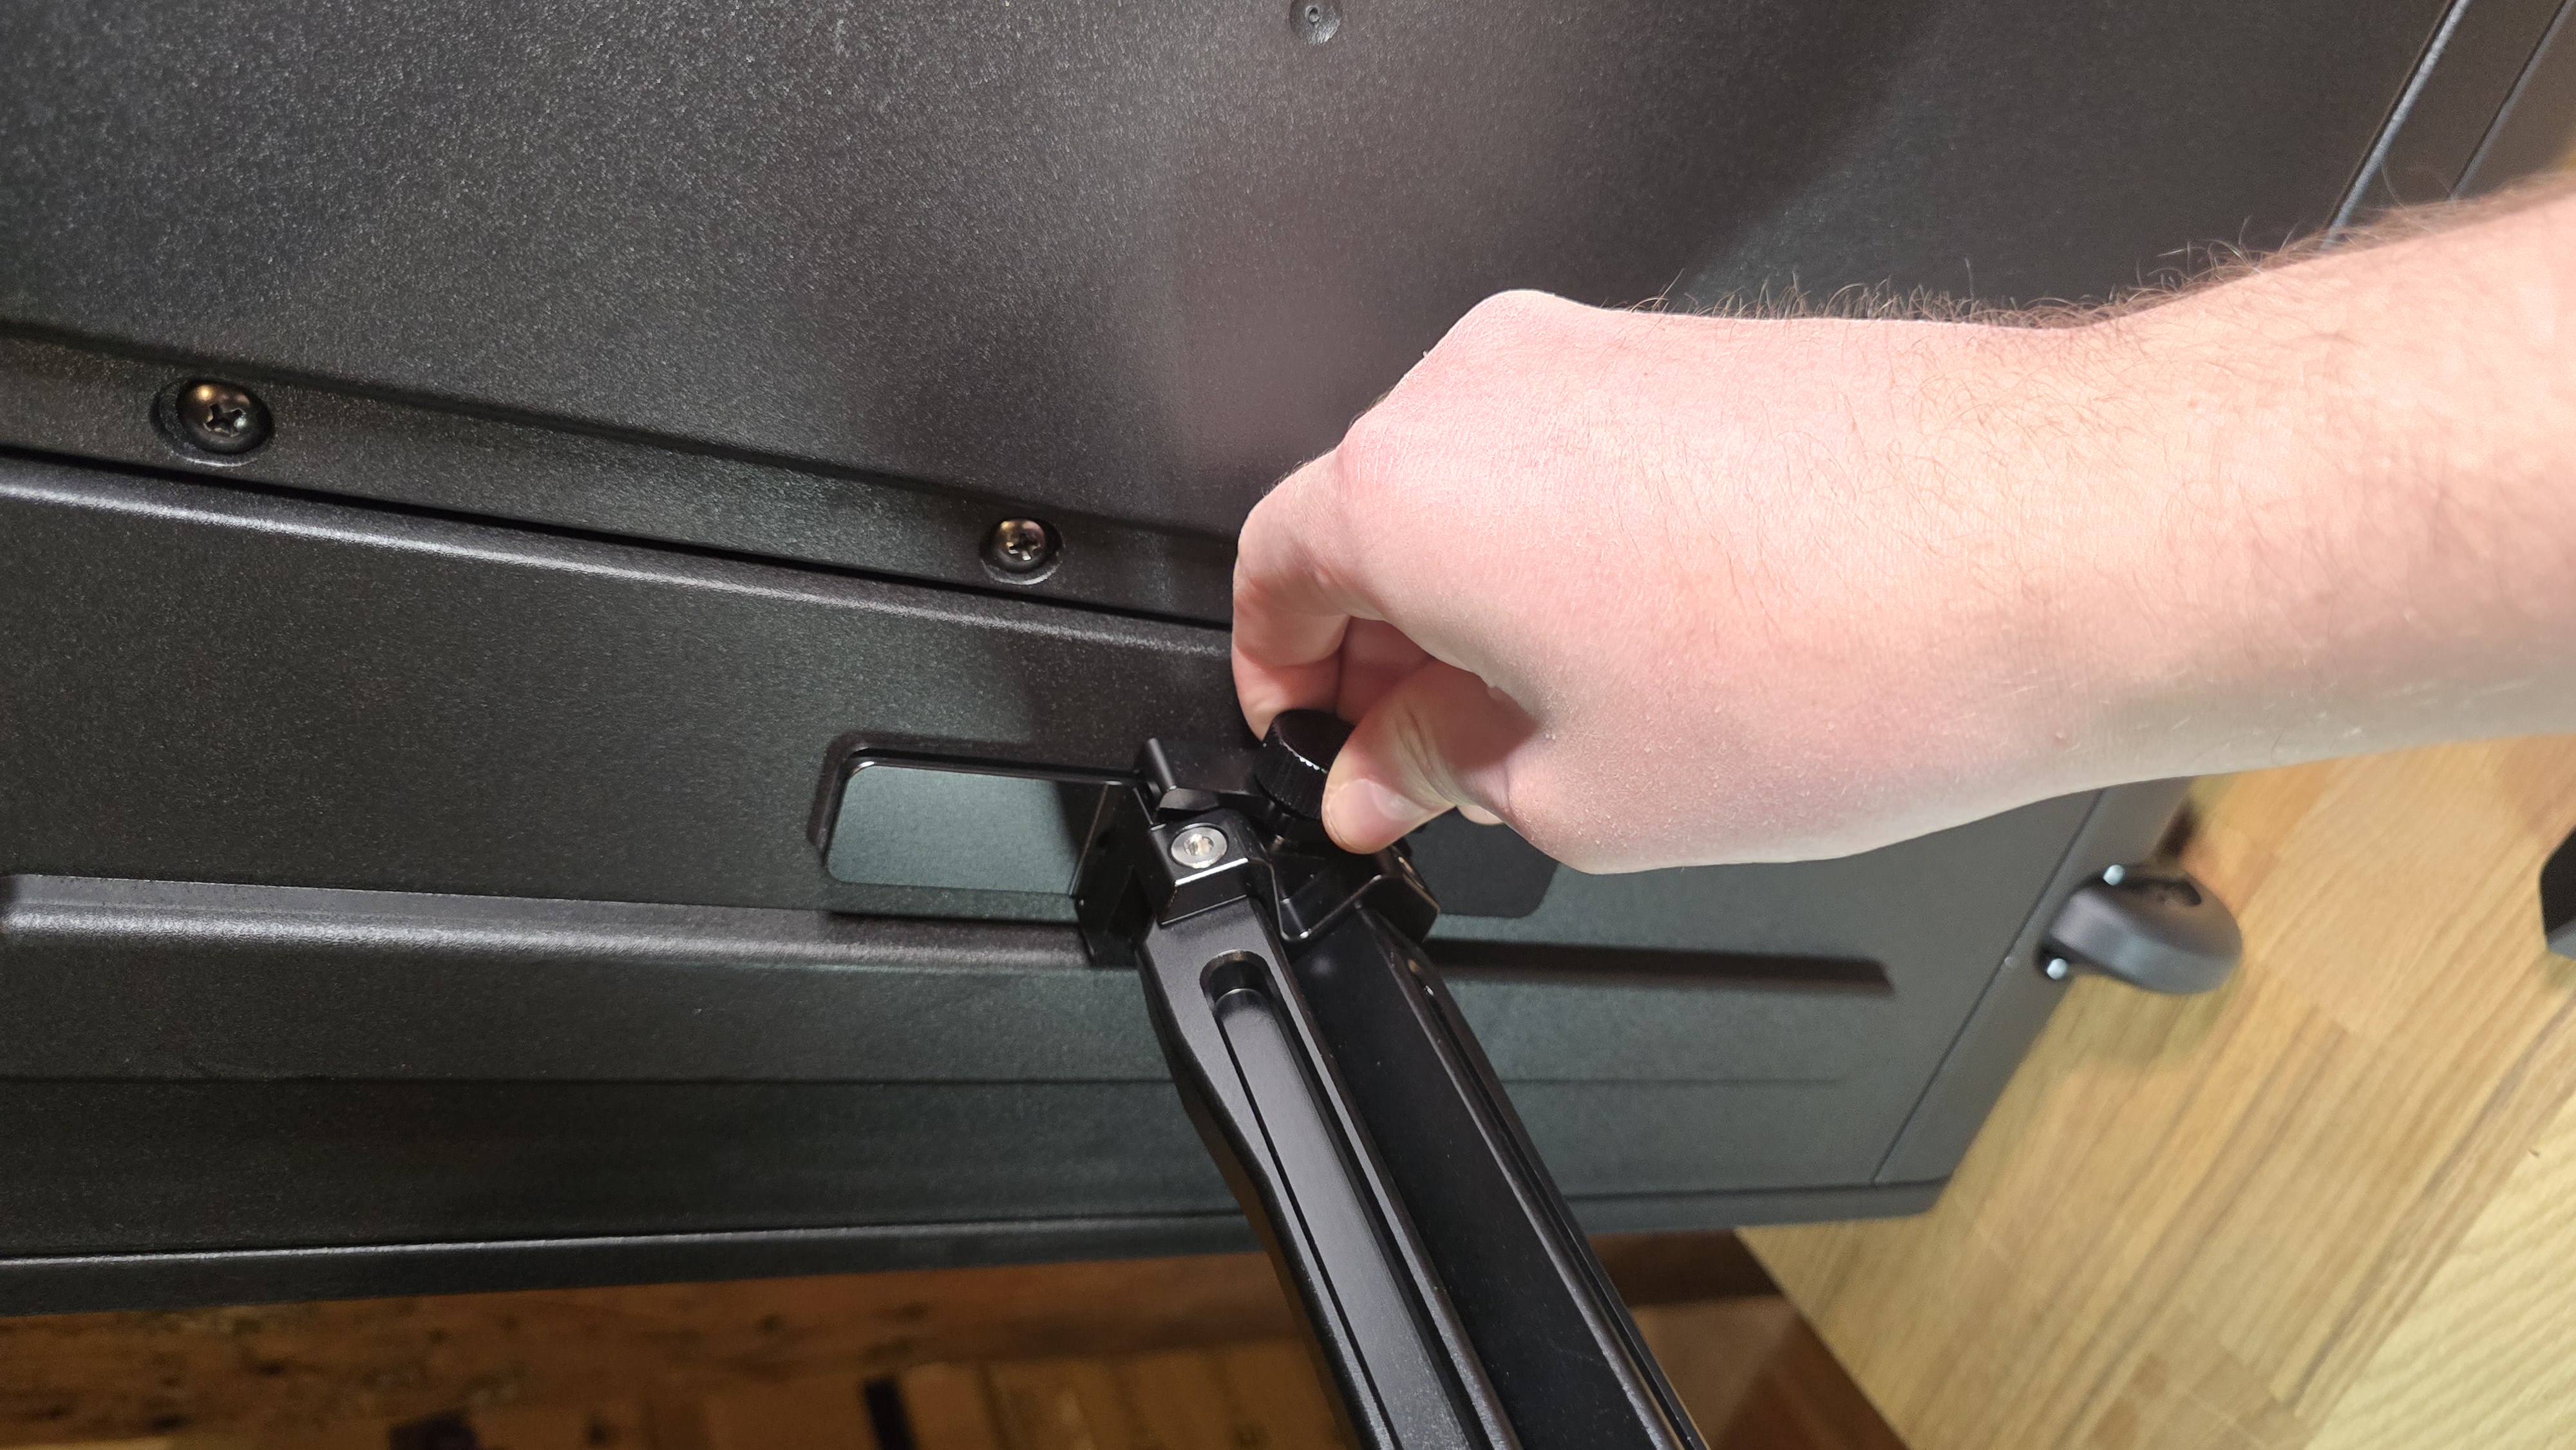
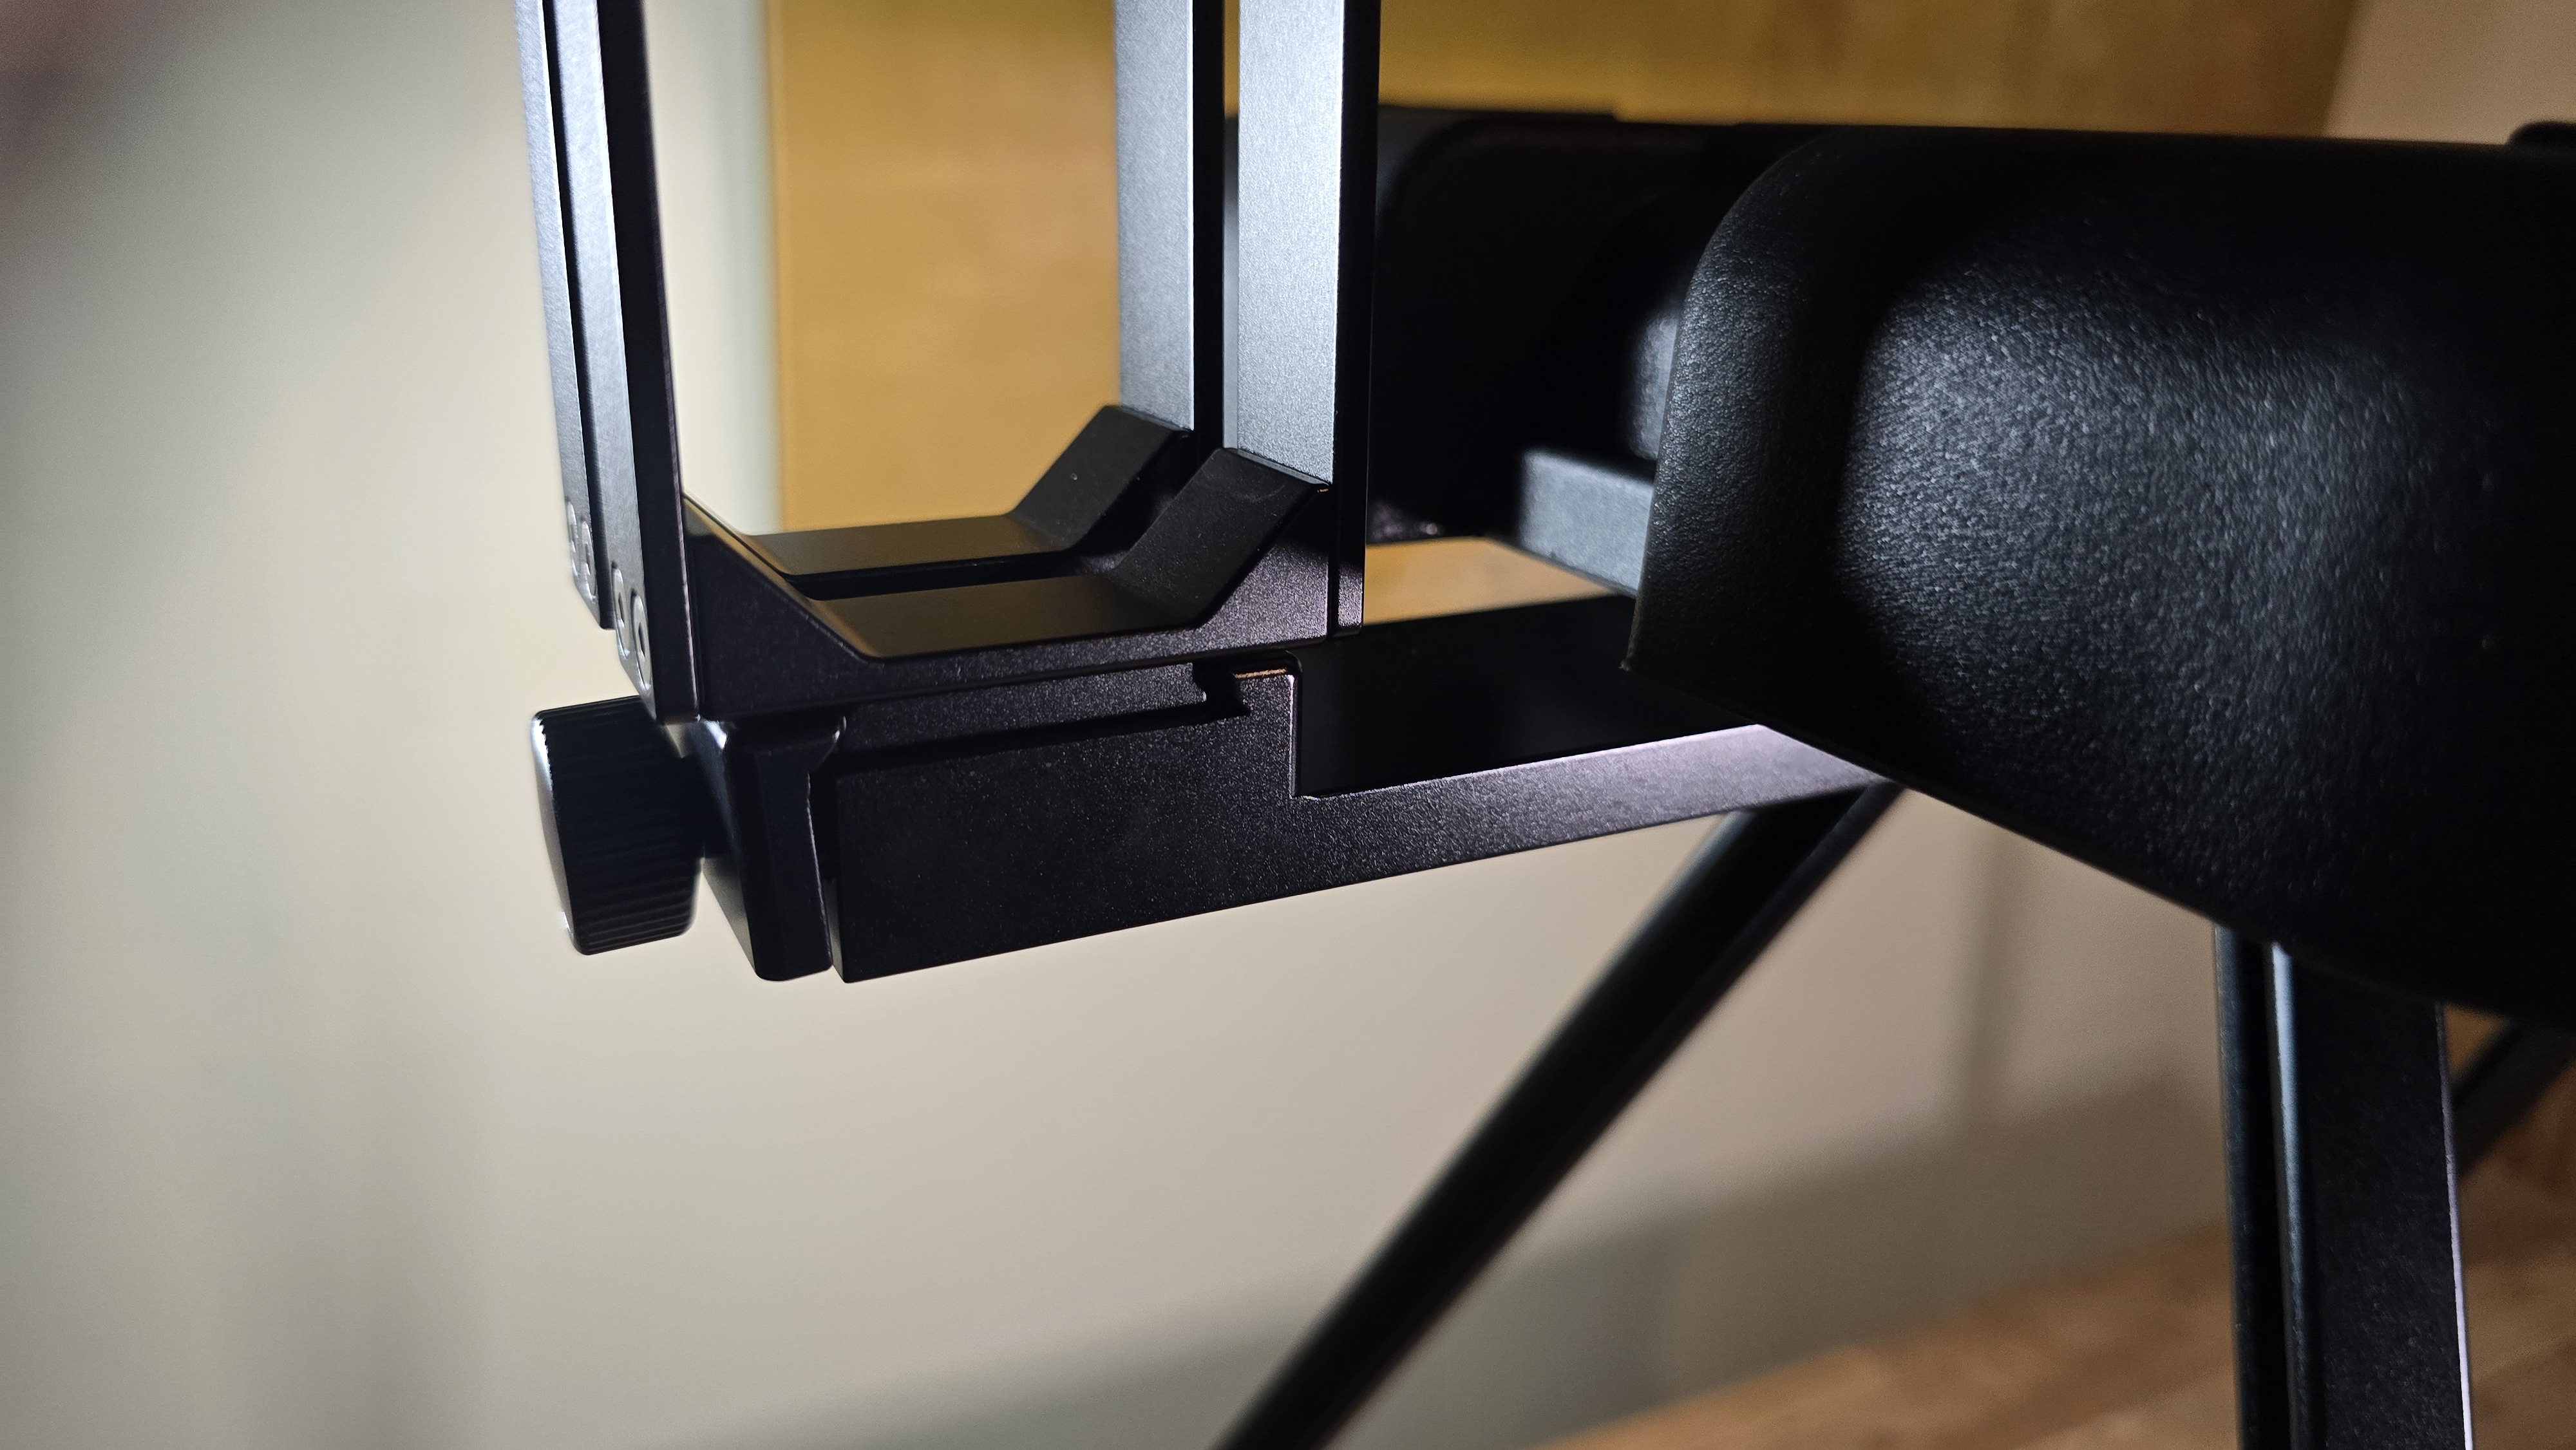
Take the leg assembly and align it with the center of the anchor point
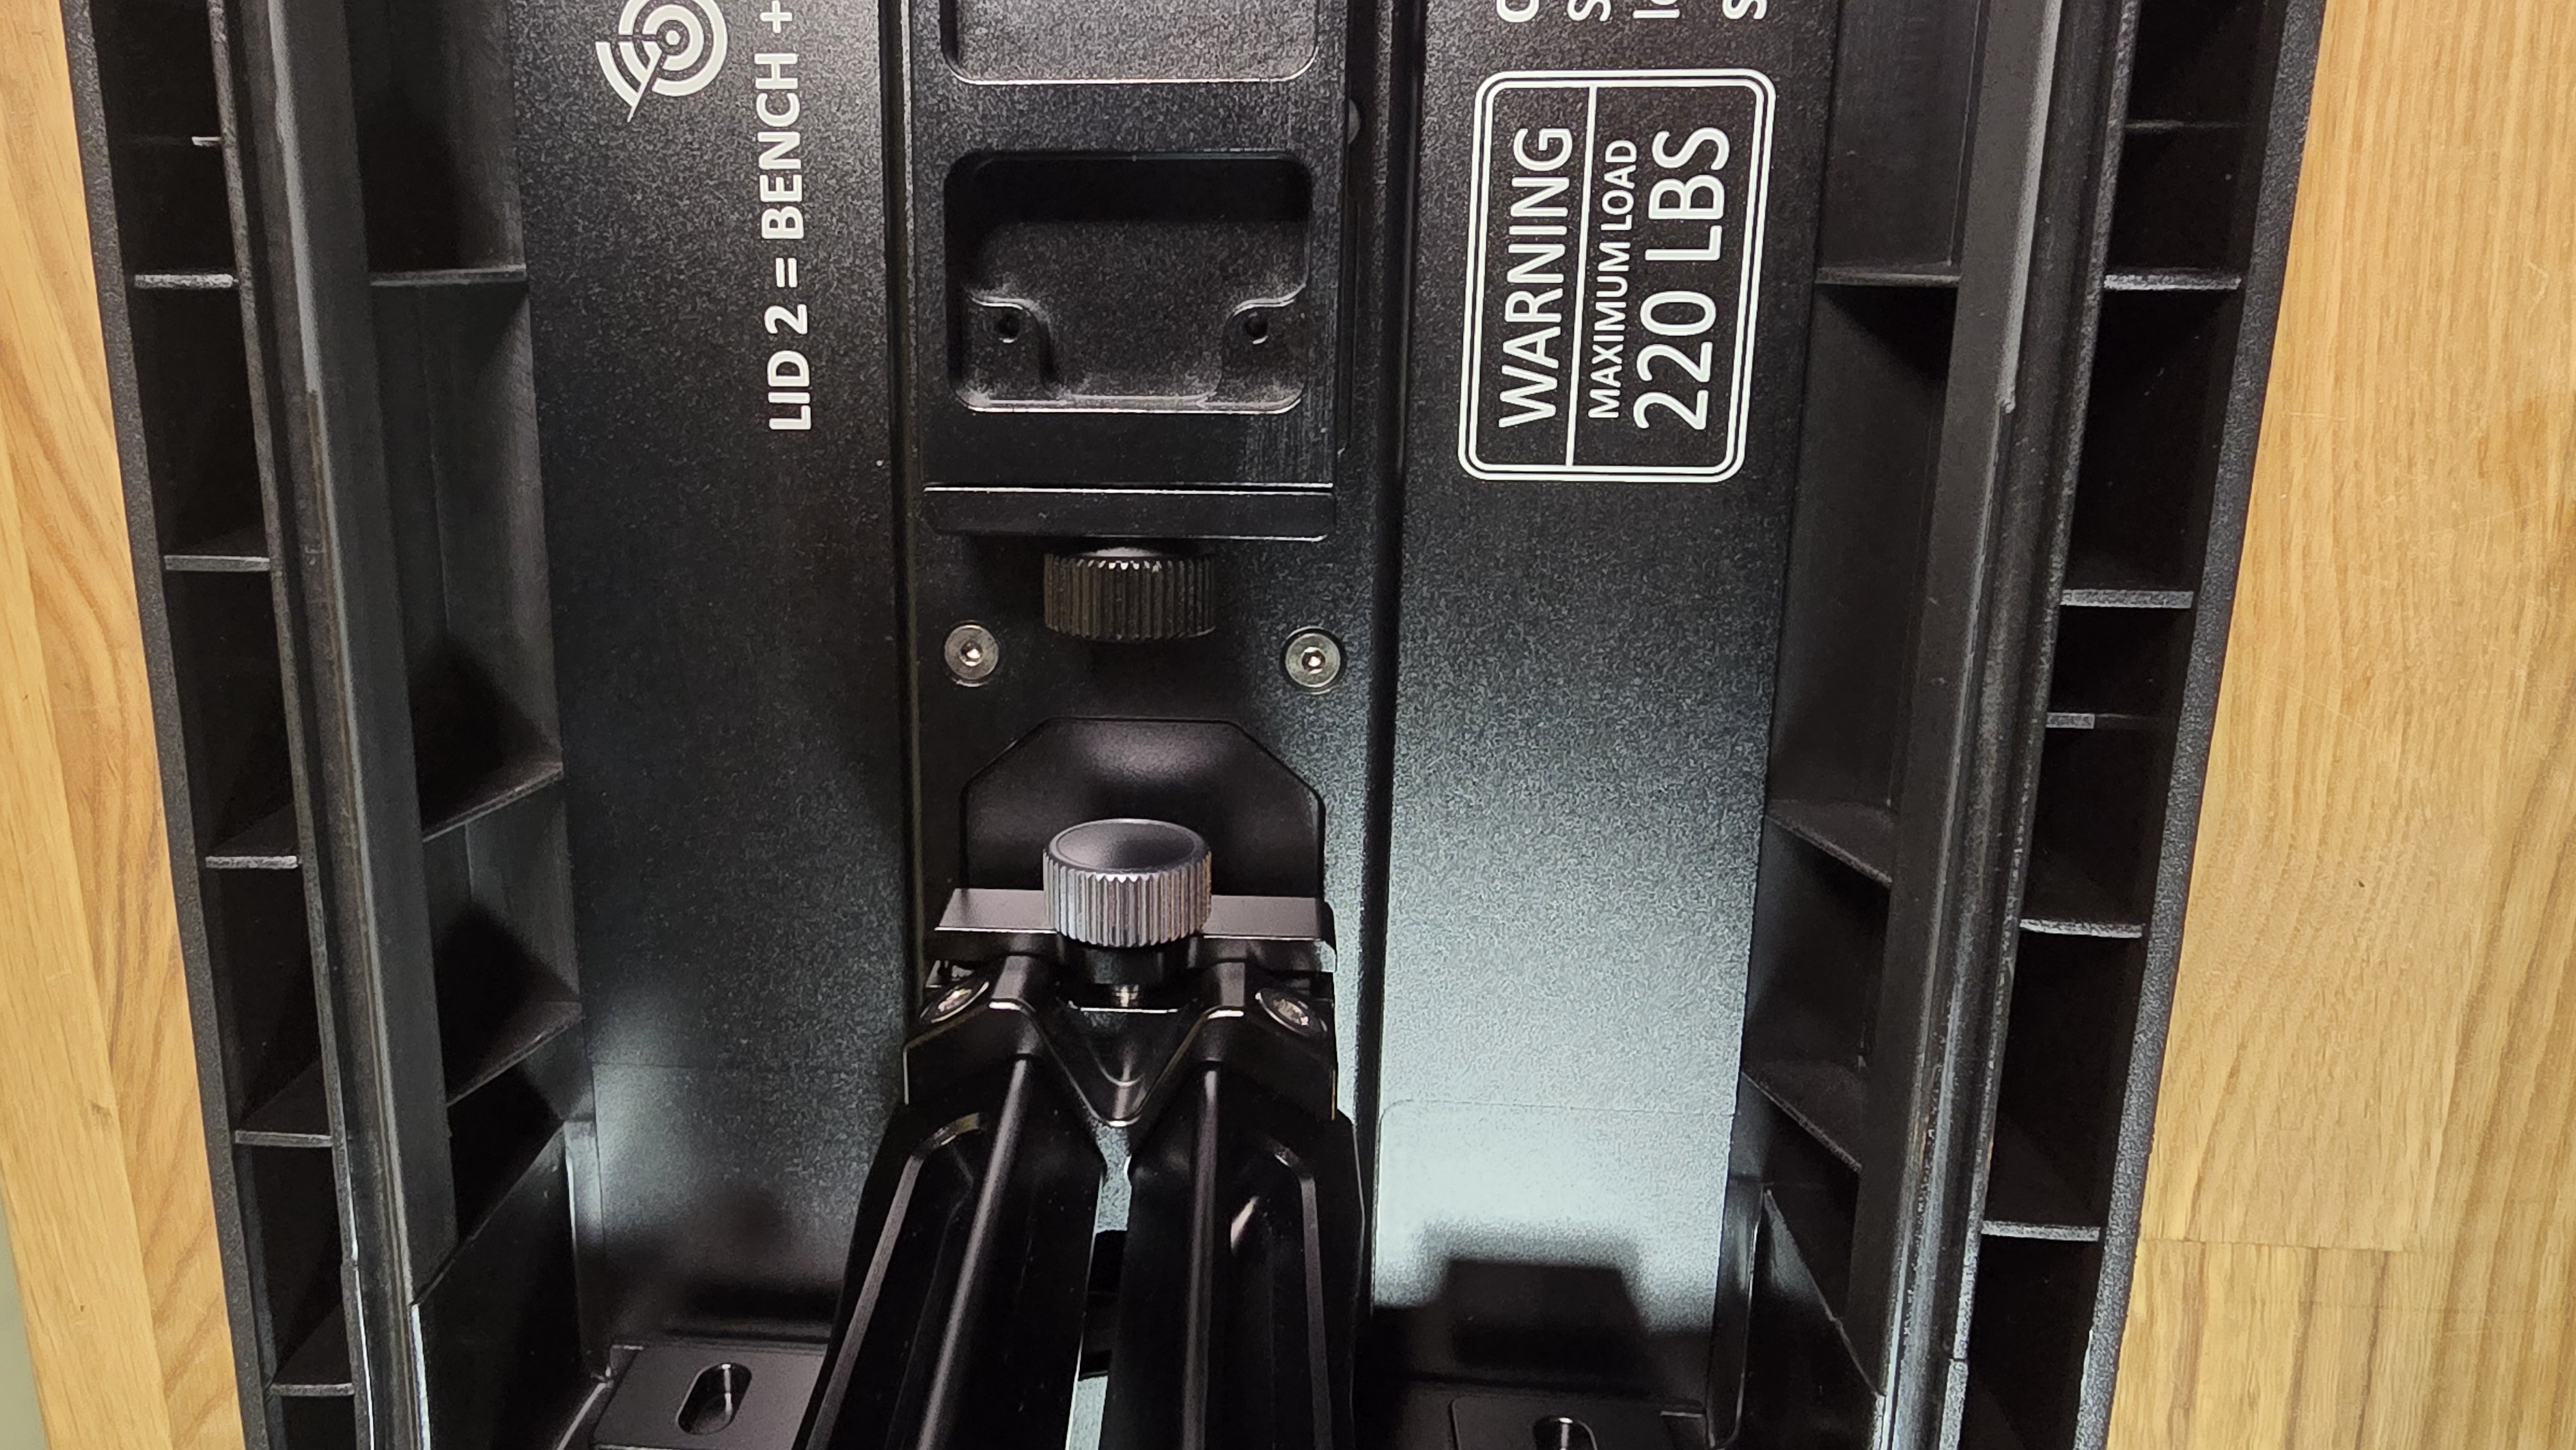
NOTE: Ensure the locking knob is facing inward, toward the center of the hardcase

- Tighten the knob to securely fasten the leg once it is aligned
- Repeat for the second leg on the opposite side
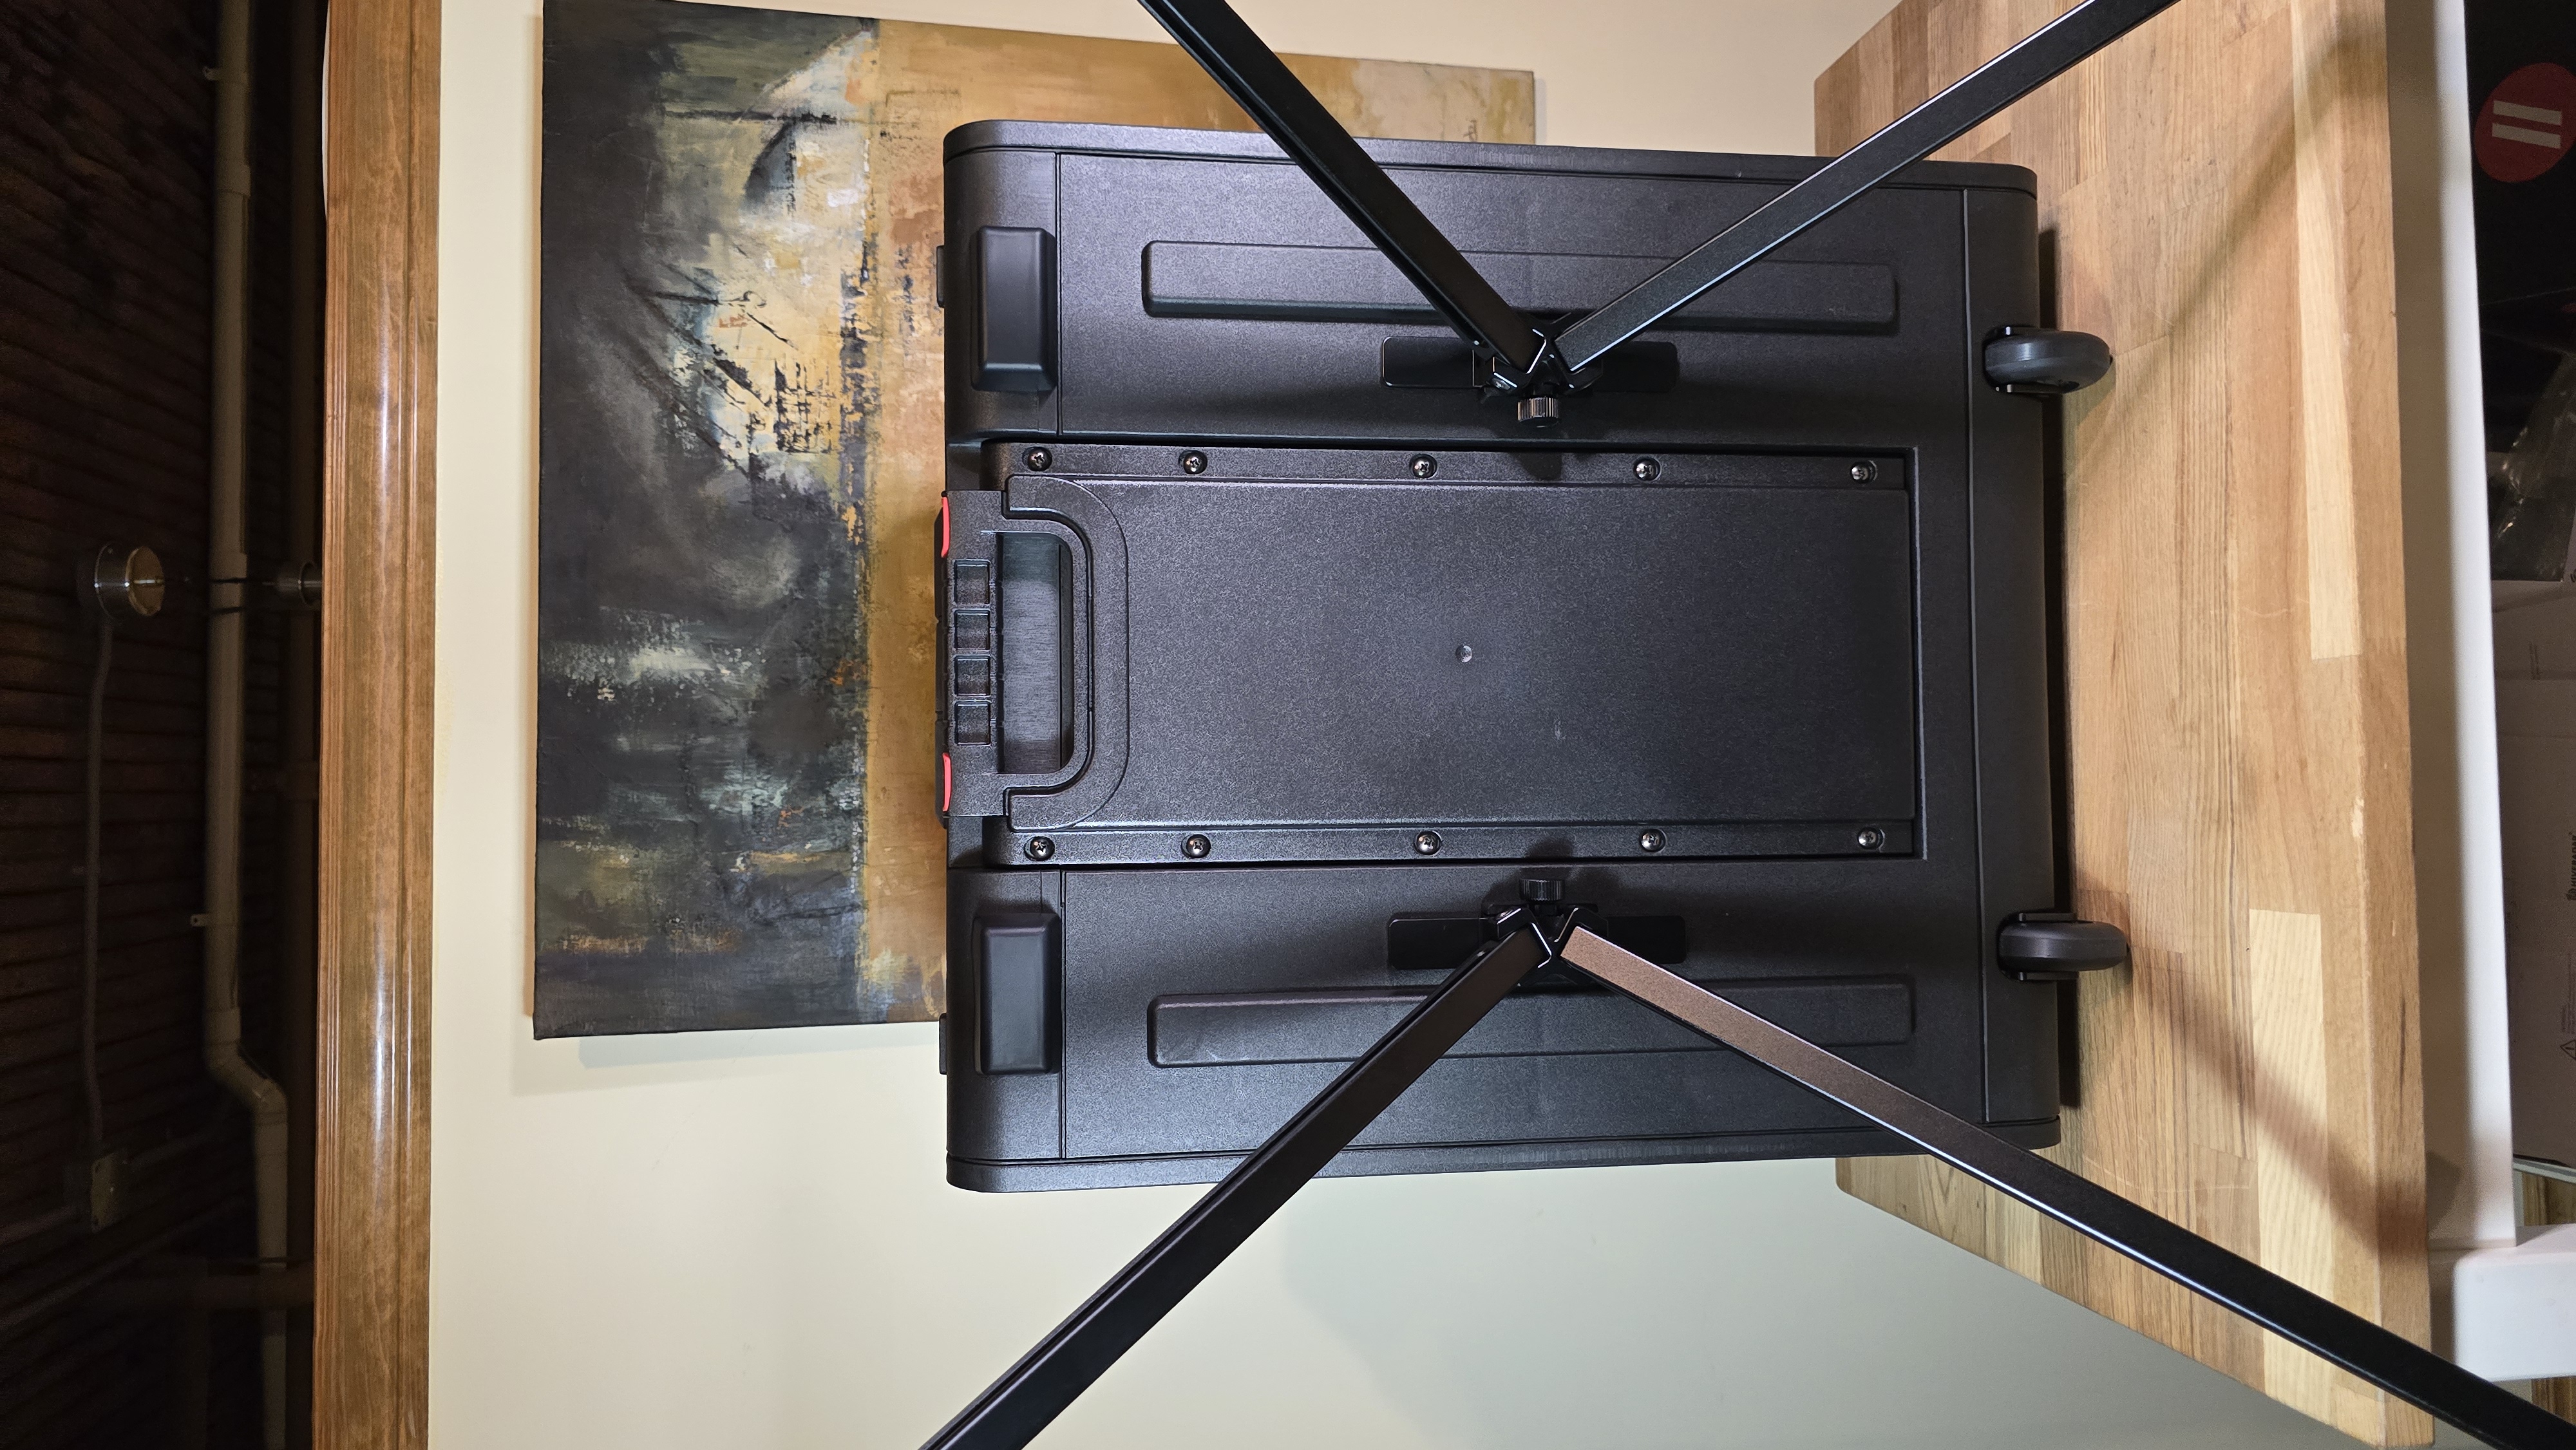
⚠️ Make sure the legs are centered, securely fastened, and fully reclined before deployment.
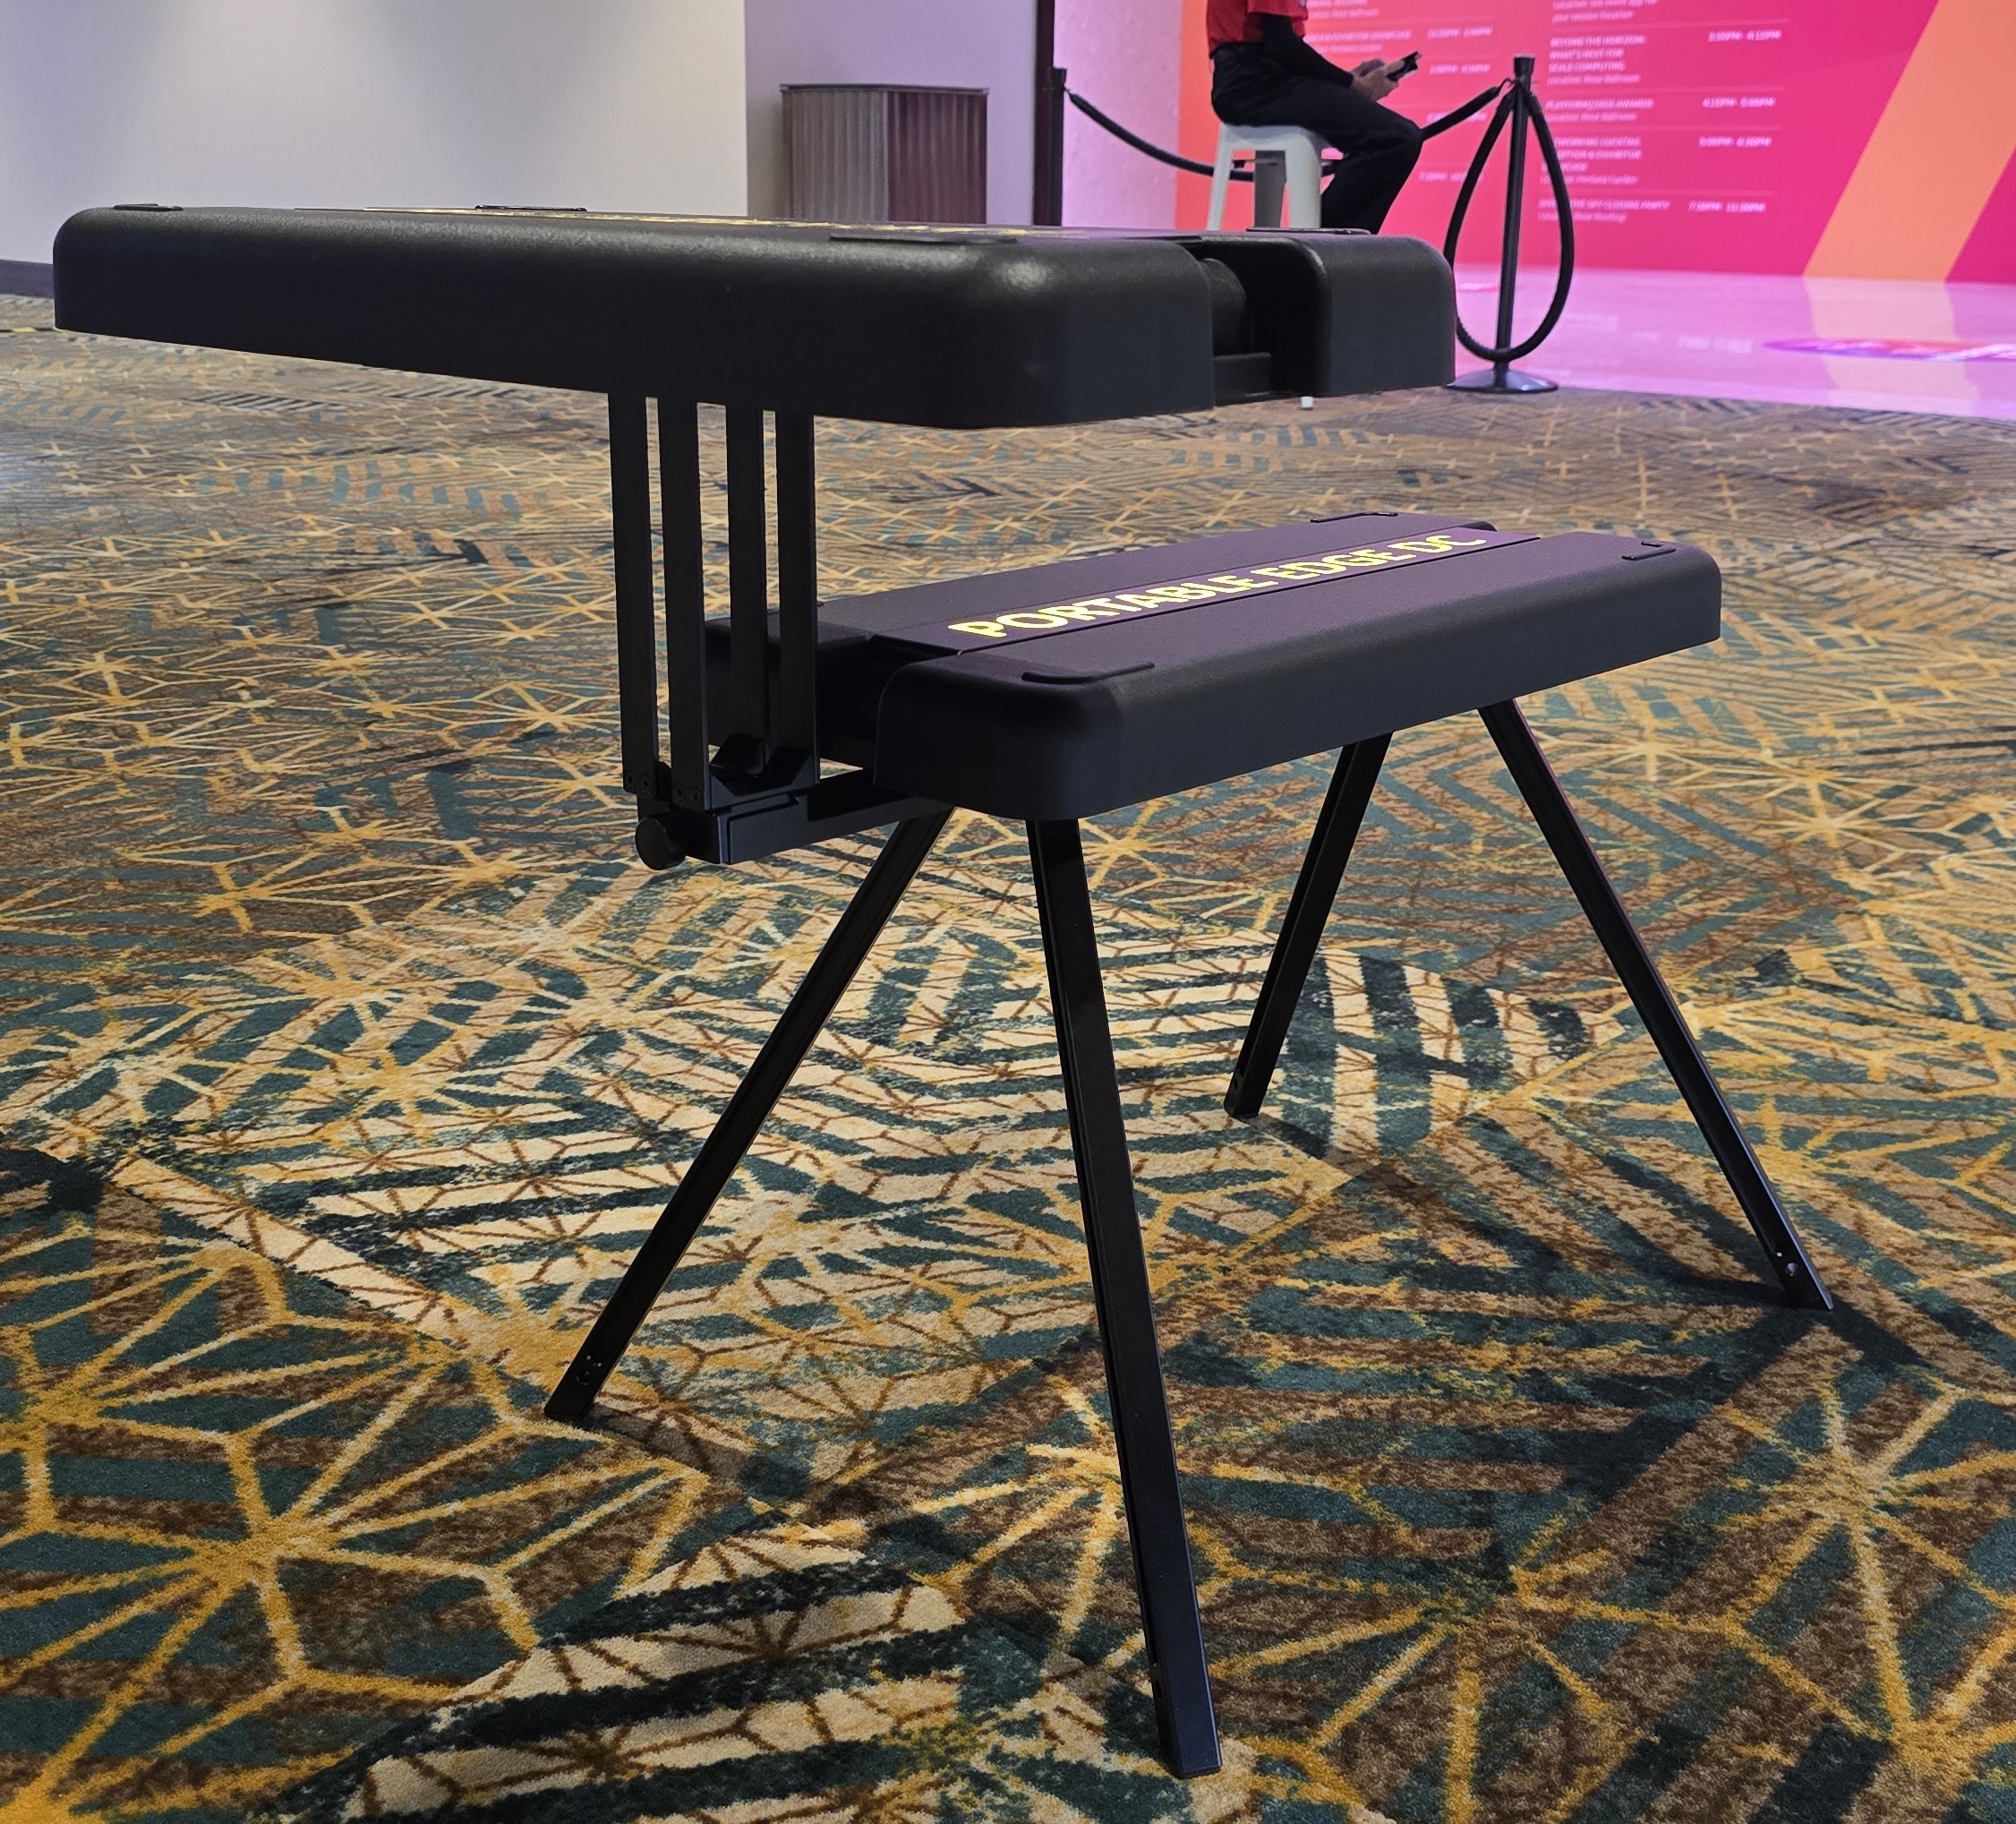
3. Deploying Bench Configuration (Optional)
Steps:
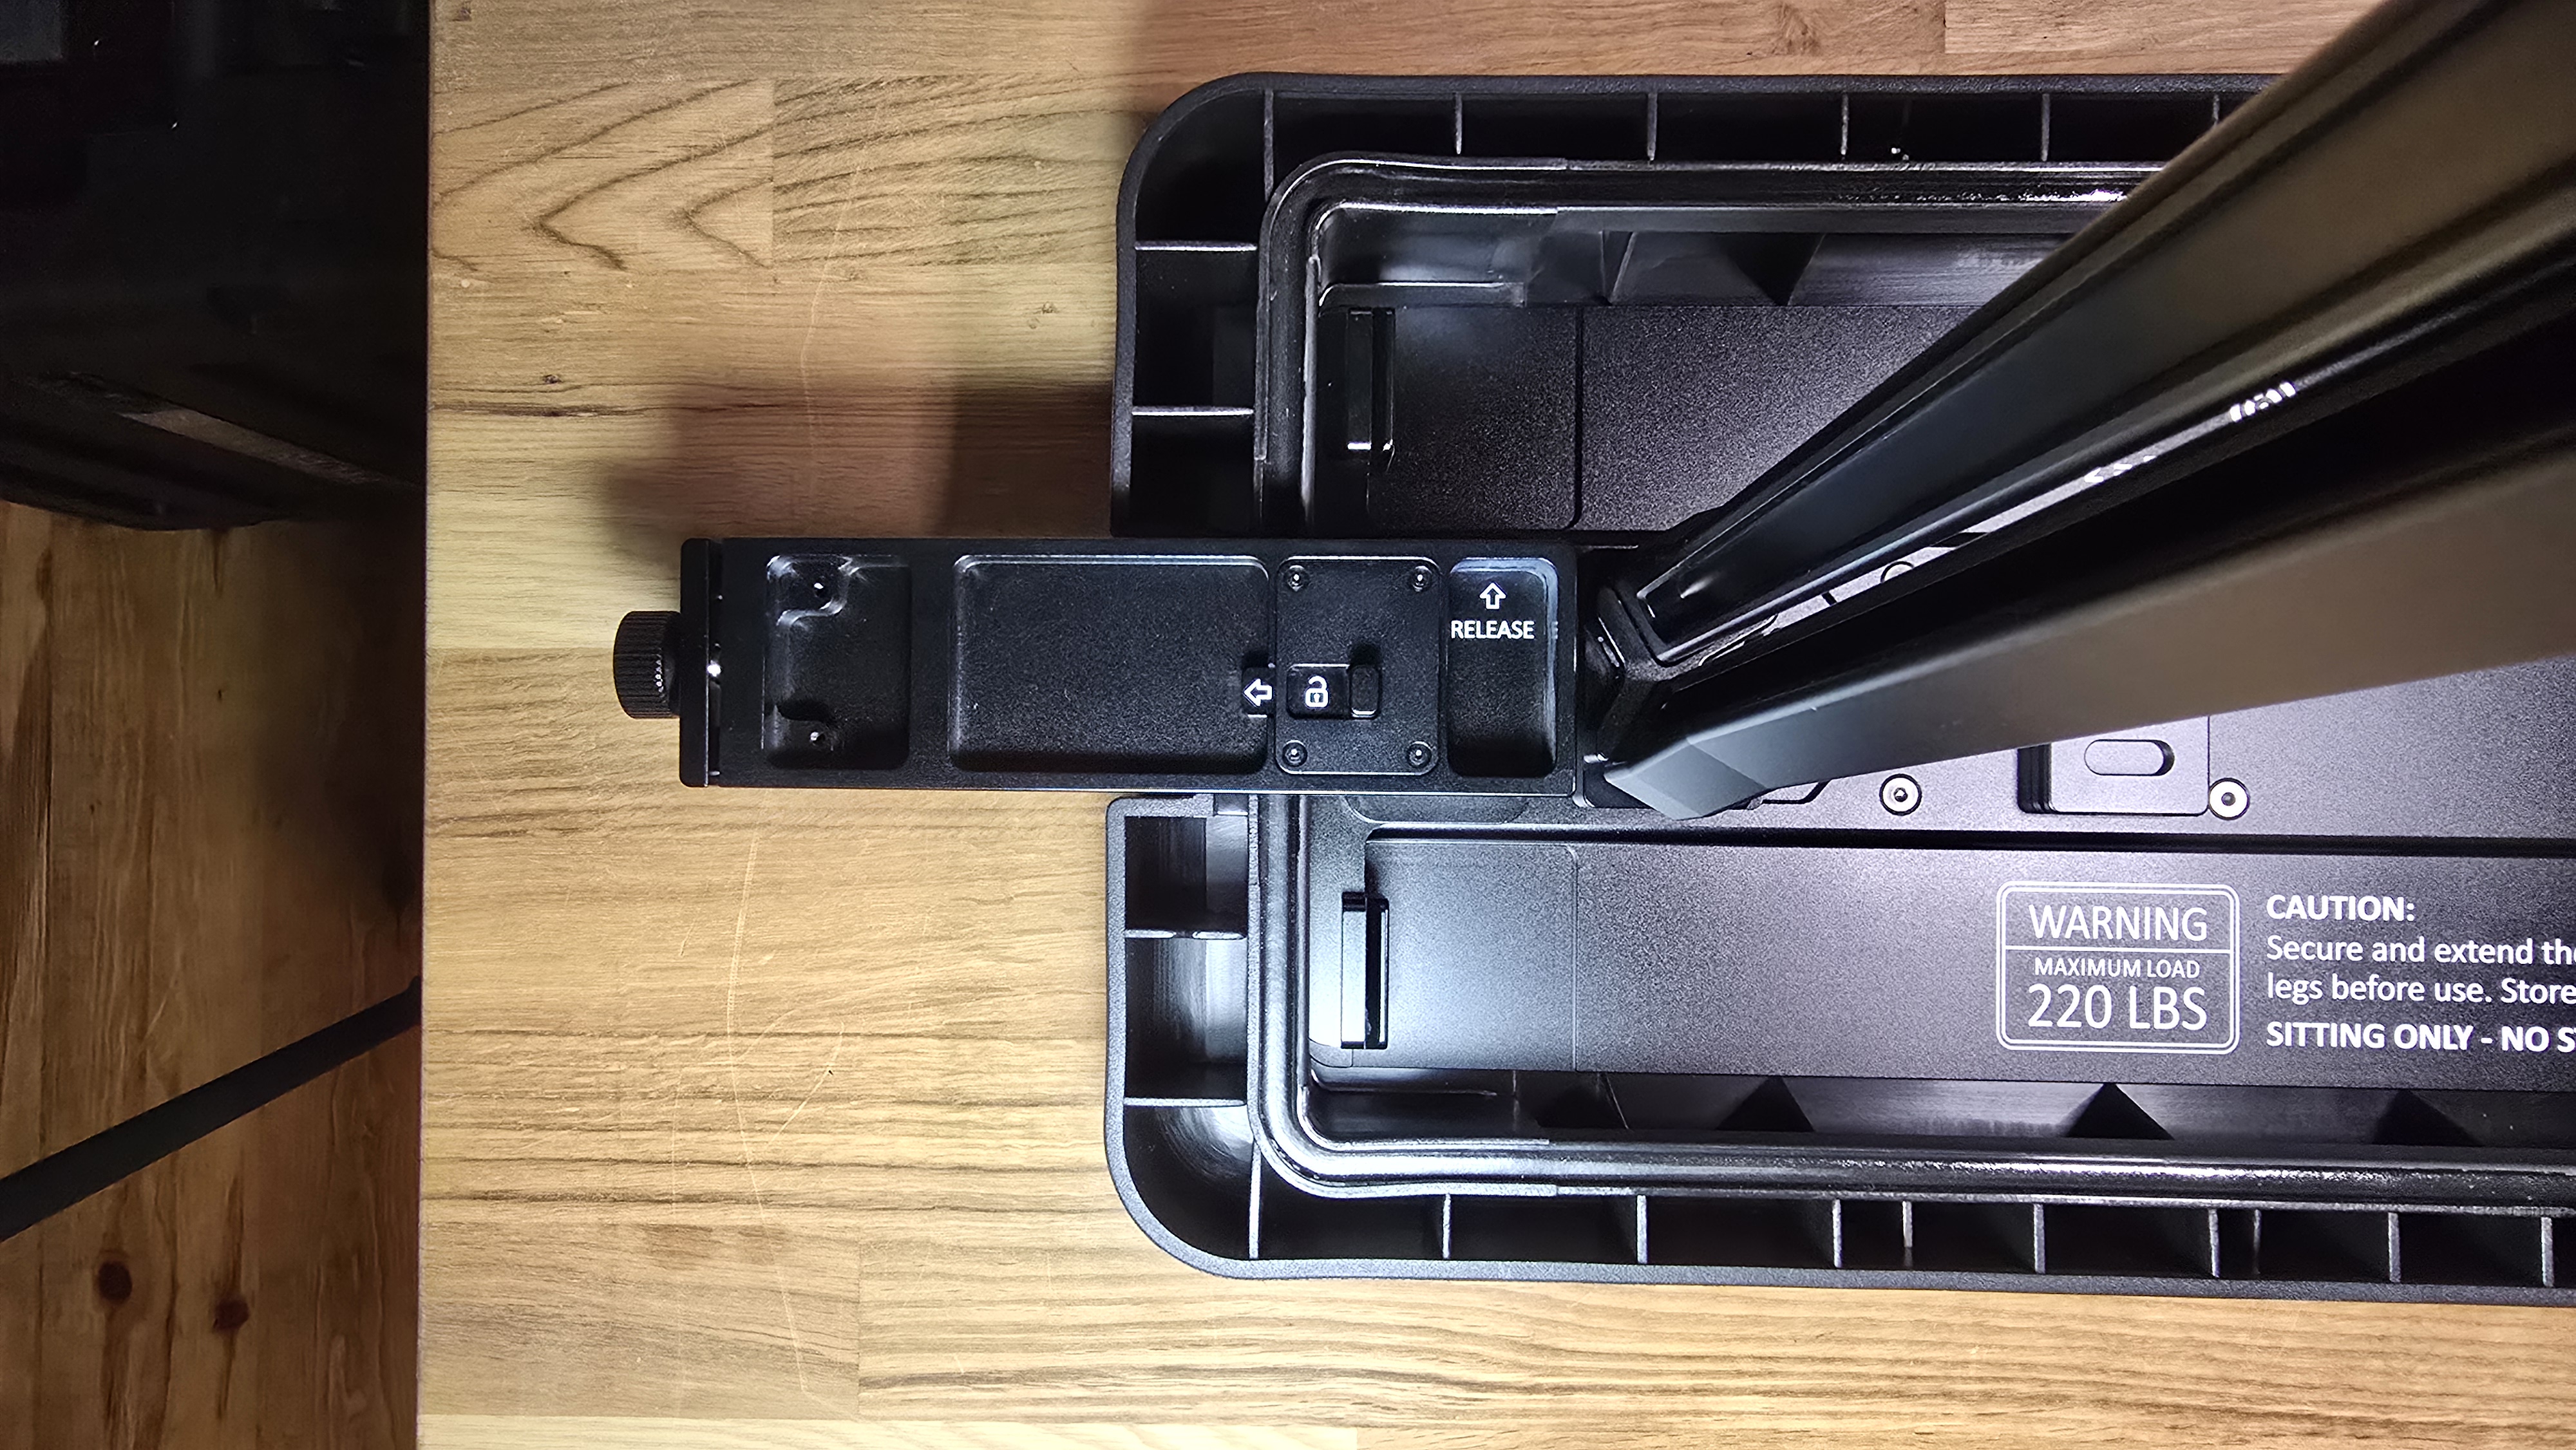
- Identify the anchor points on the bottom of the bench lid
-
Take the leg assembly and align it with the center of the anchor point
NOTE: Ensure the locking knob is facing inward, toward the center of the hardcase
-
Tighten the knob to securely fasten the leg once it is aligned
-
Repeat for the second leg on the opposite side
- Extend the leg assemblies fully. Your bench is ready to go!
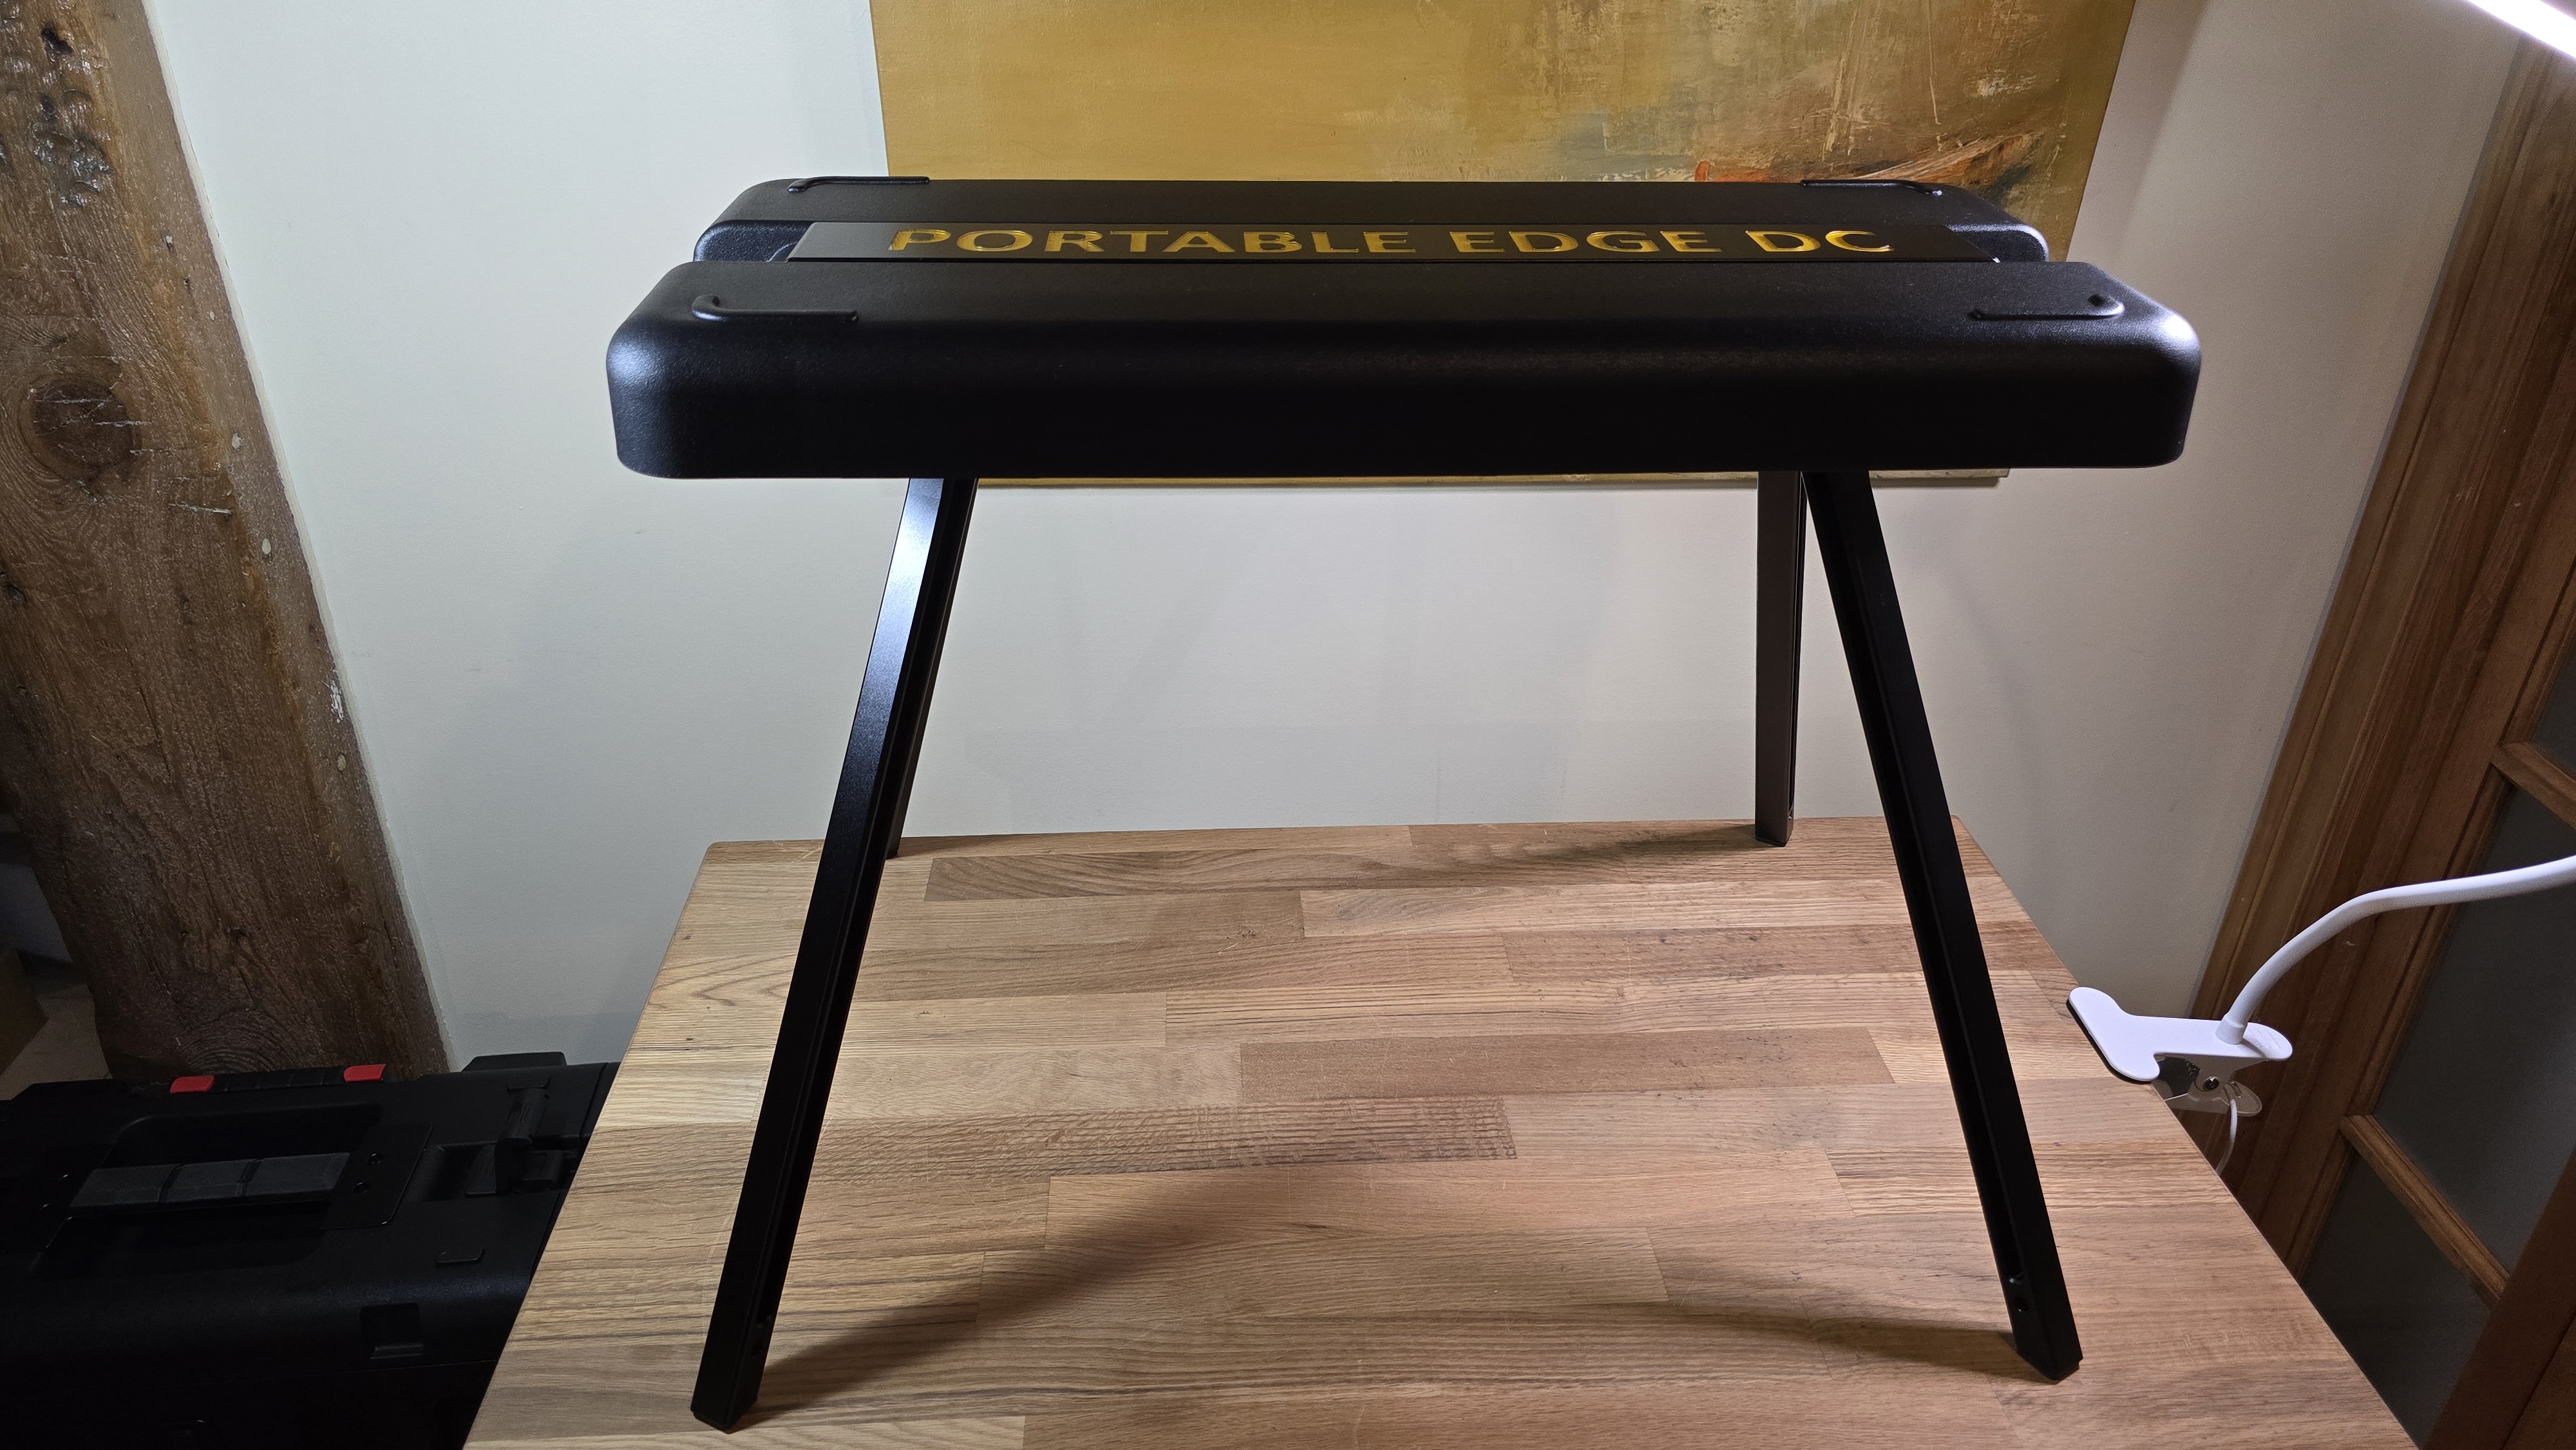
⚠️ Make sure the legs are centered, securely fastened, and fully reclined before deployment.
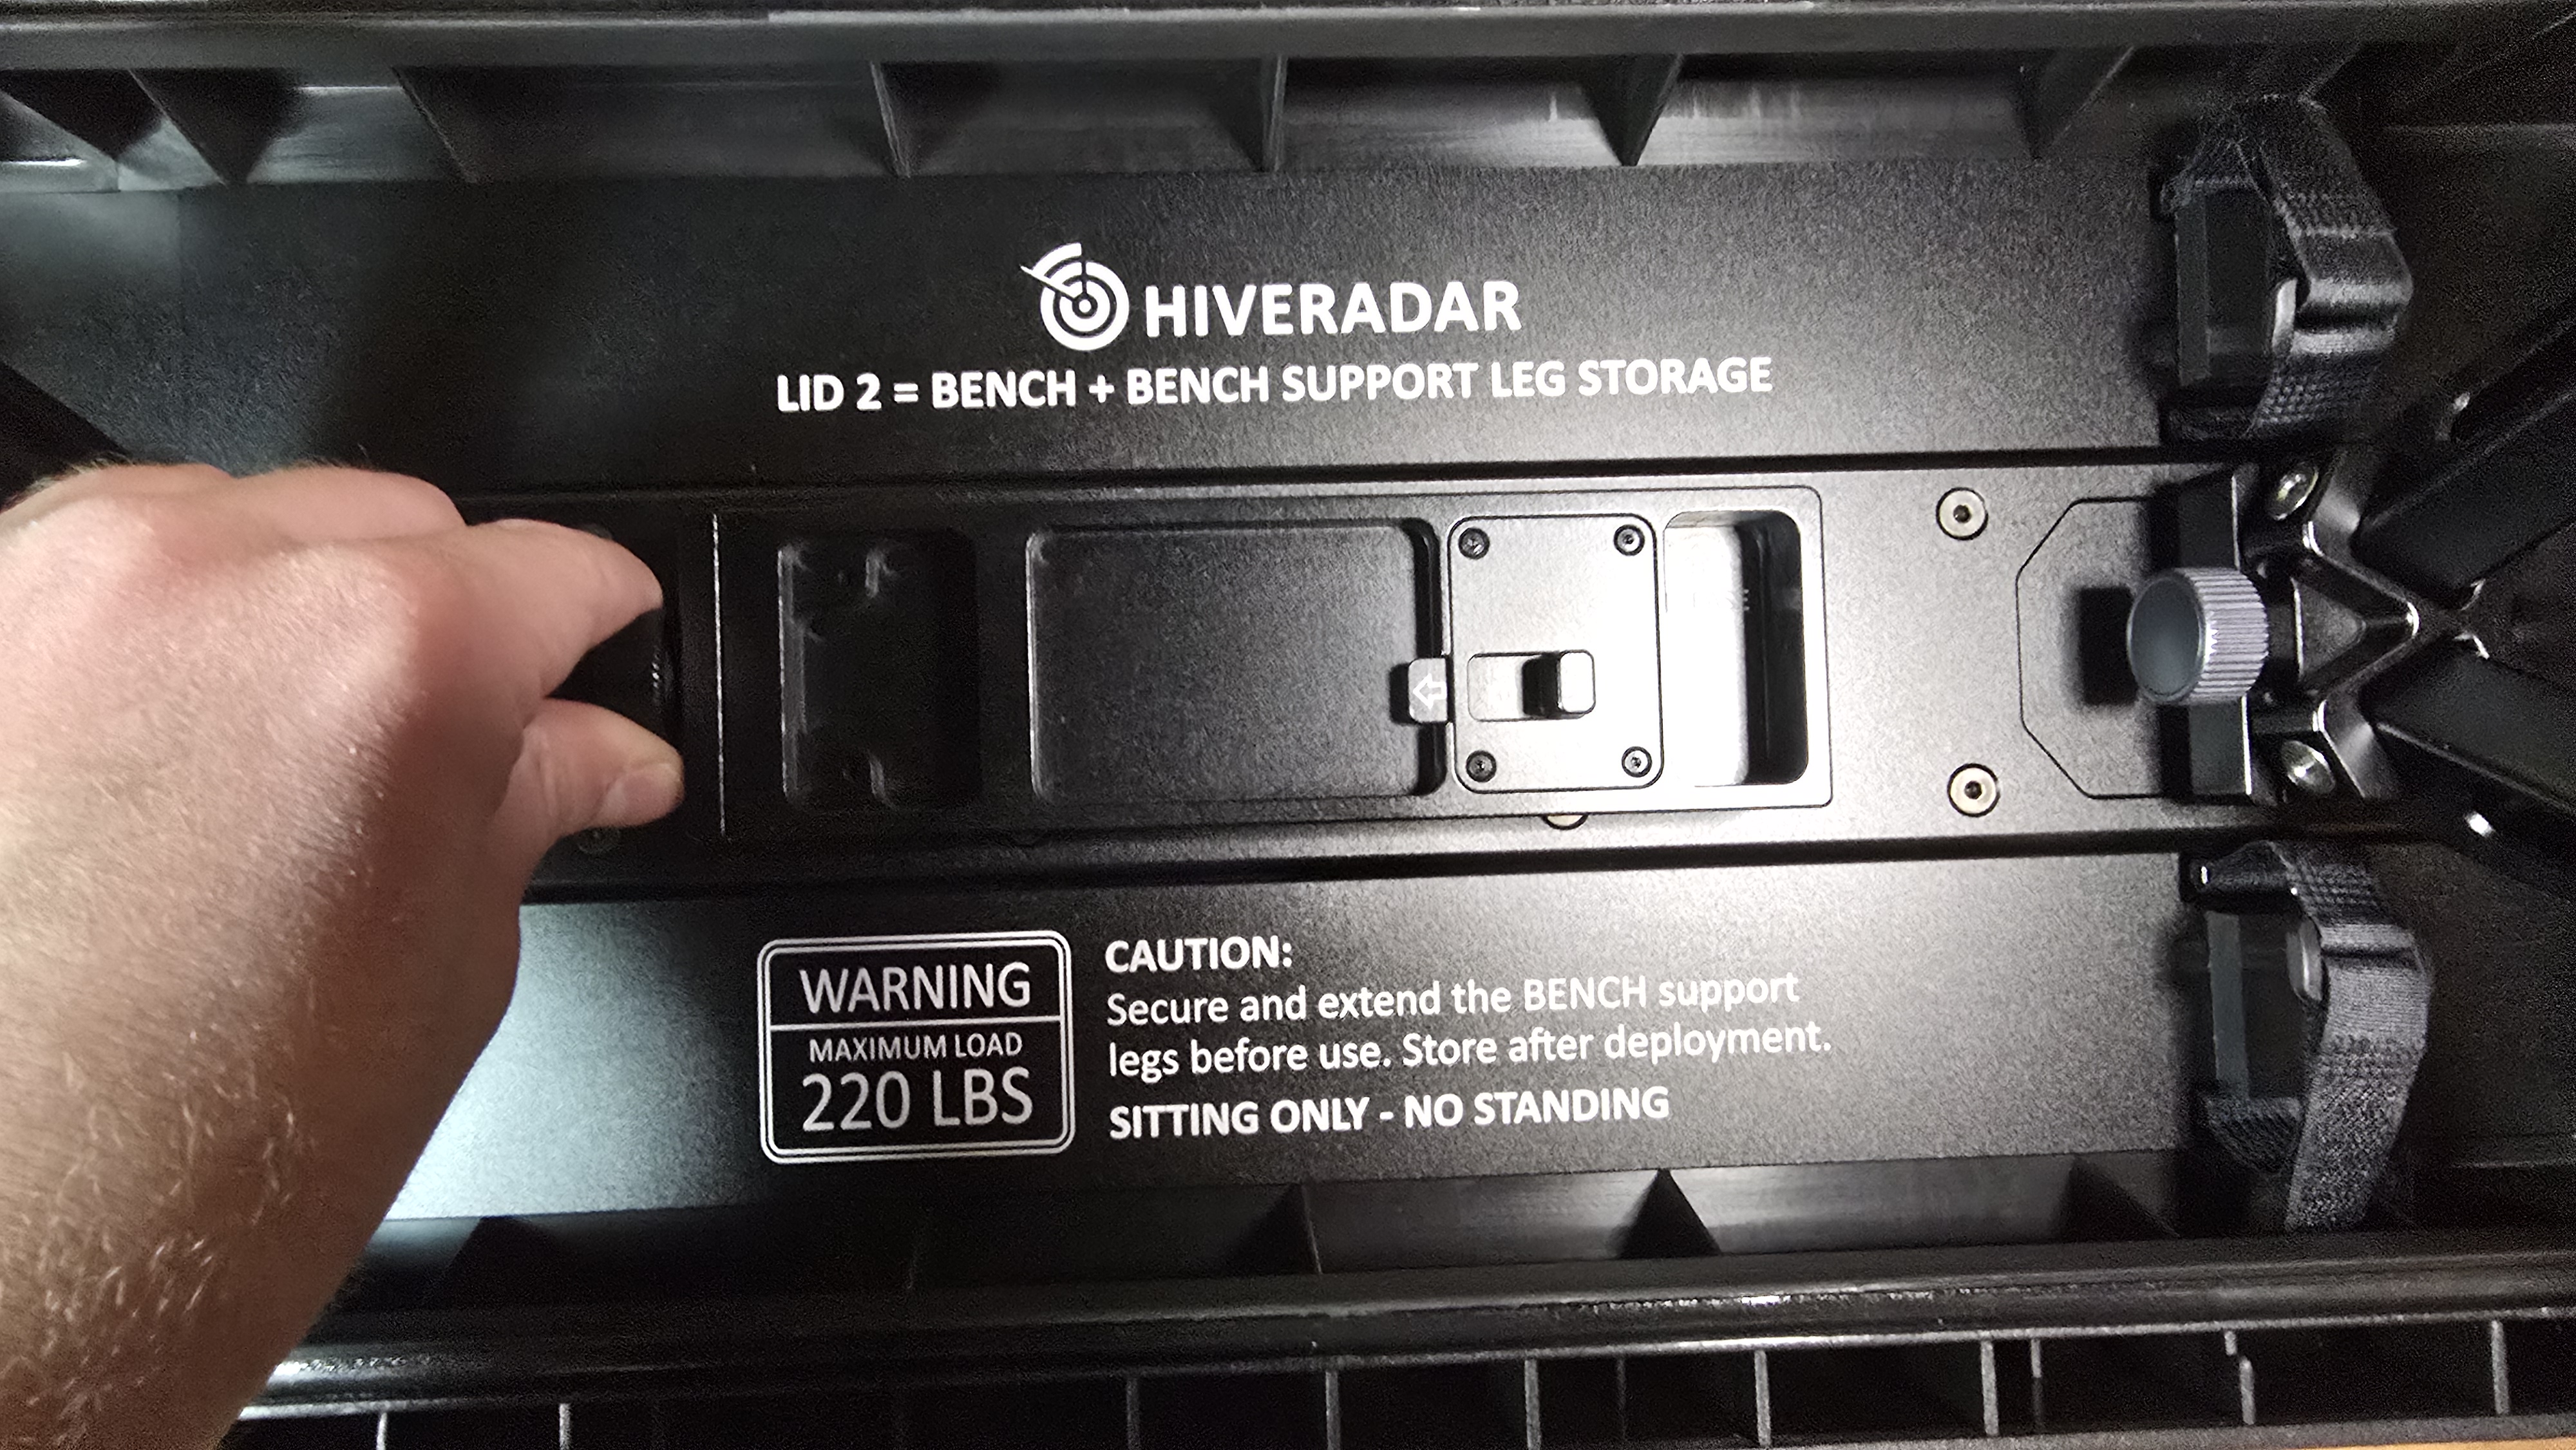
⚠️ Ensure stability before sitting or placing weight on the bench. ⚠️ Maximum load: 220 lbs (sitting only - NO STANDING)
4. Work Surface Assembly (Optional)
To add the work surface lid to the bench for a complete field work setup:
Steps:
-
Once the bench is deployed, take both the bench lid and the work surface lid and place them on a horizontal surface upside down
-
Identify the Work Surface Arm, which is stored on the underside of the bench lid, and remove it from its storage by unscrewing the side knob
- Identify the Work Surface anchor on the left side of the bench lid. Using the Work Surface Arm, slide the attachment mechanism from top to bottom in a linear motion until it clicks into place
-
Rotate the bench and place it on the legs on the ground
-
On the work surface lid (Lid 1, which housed the EDC support legs), identify the 2 articulating arms around the carbon fiber storage area
- If the carbon fiber extension pole has not been removed, work around it
- Rotate each articulating arm 90 degrees outward
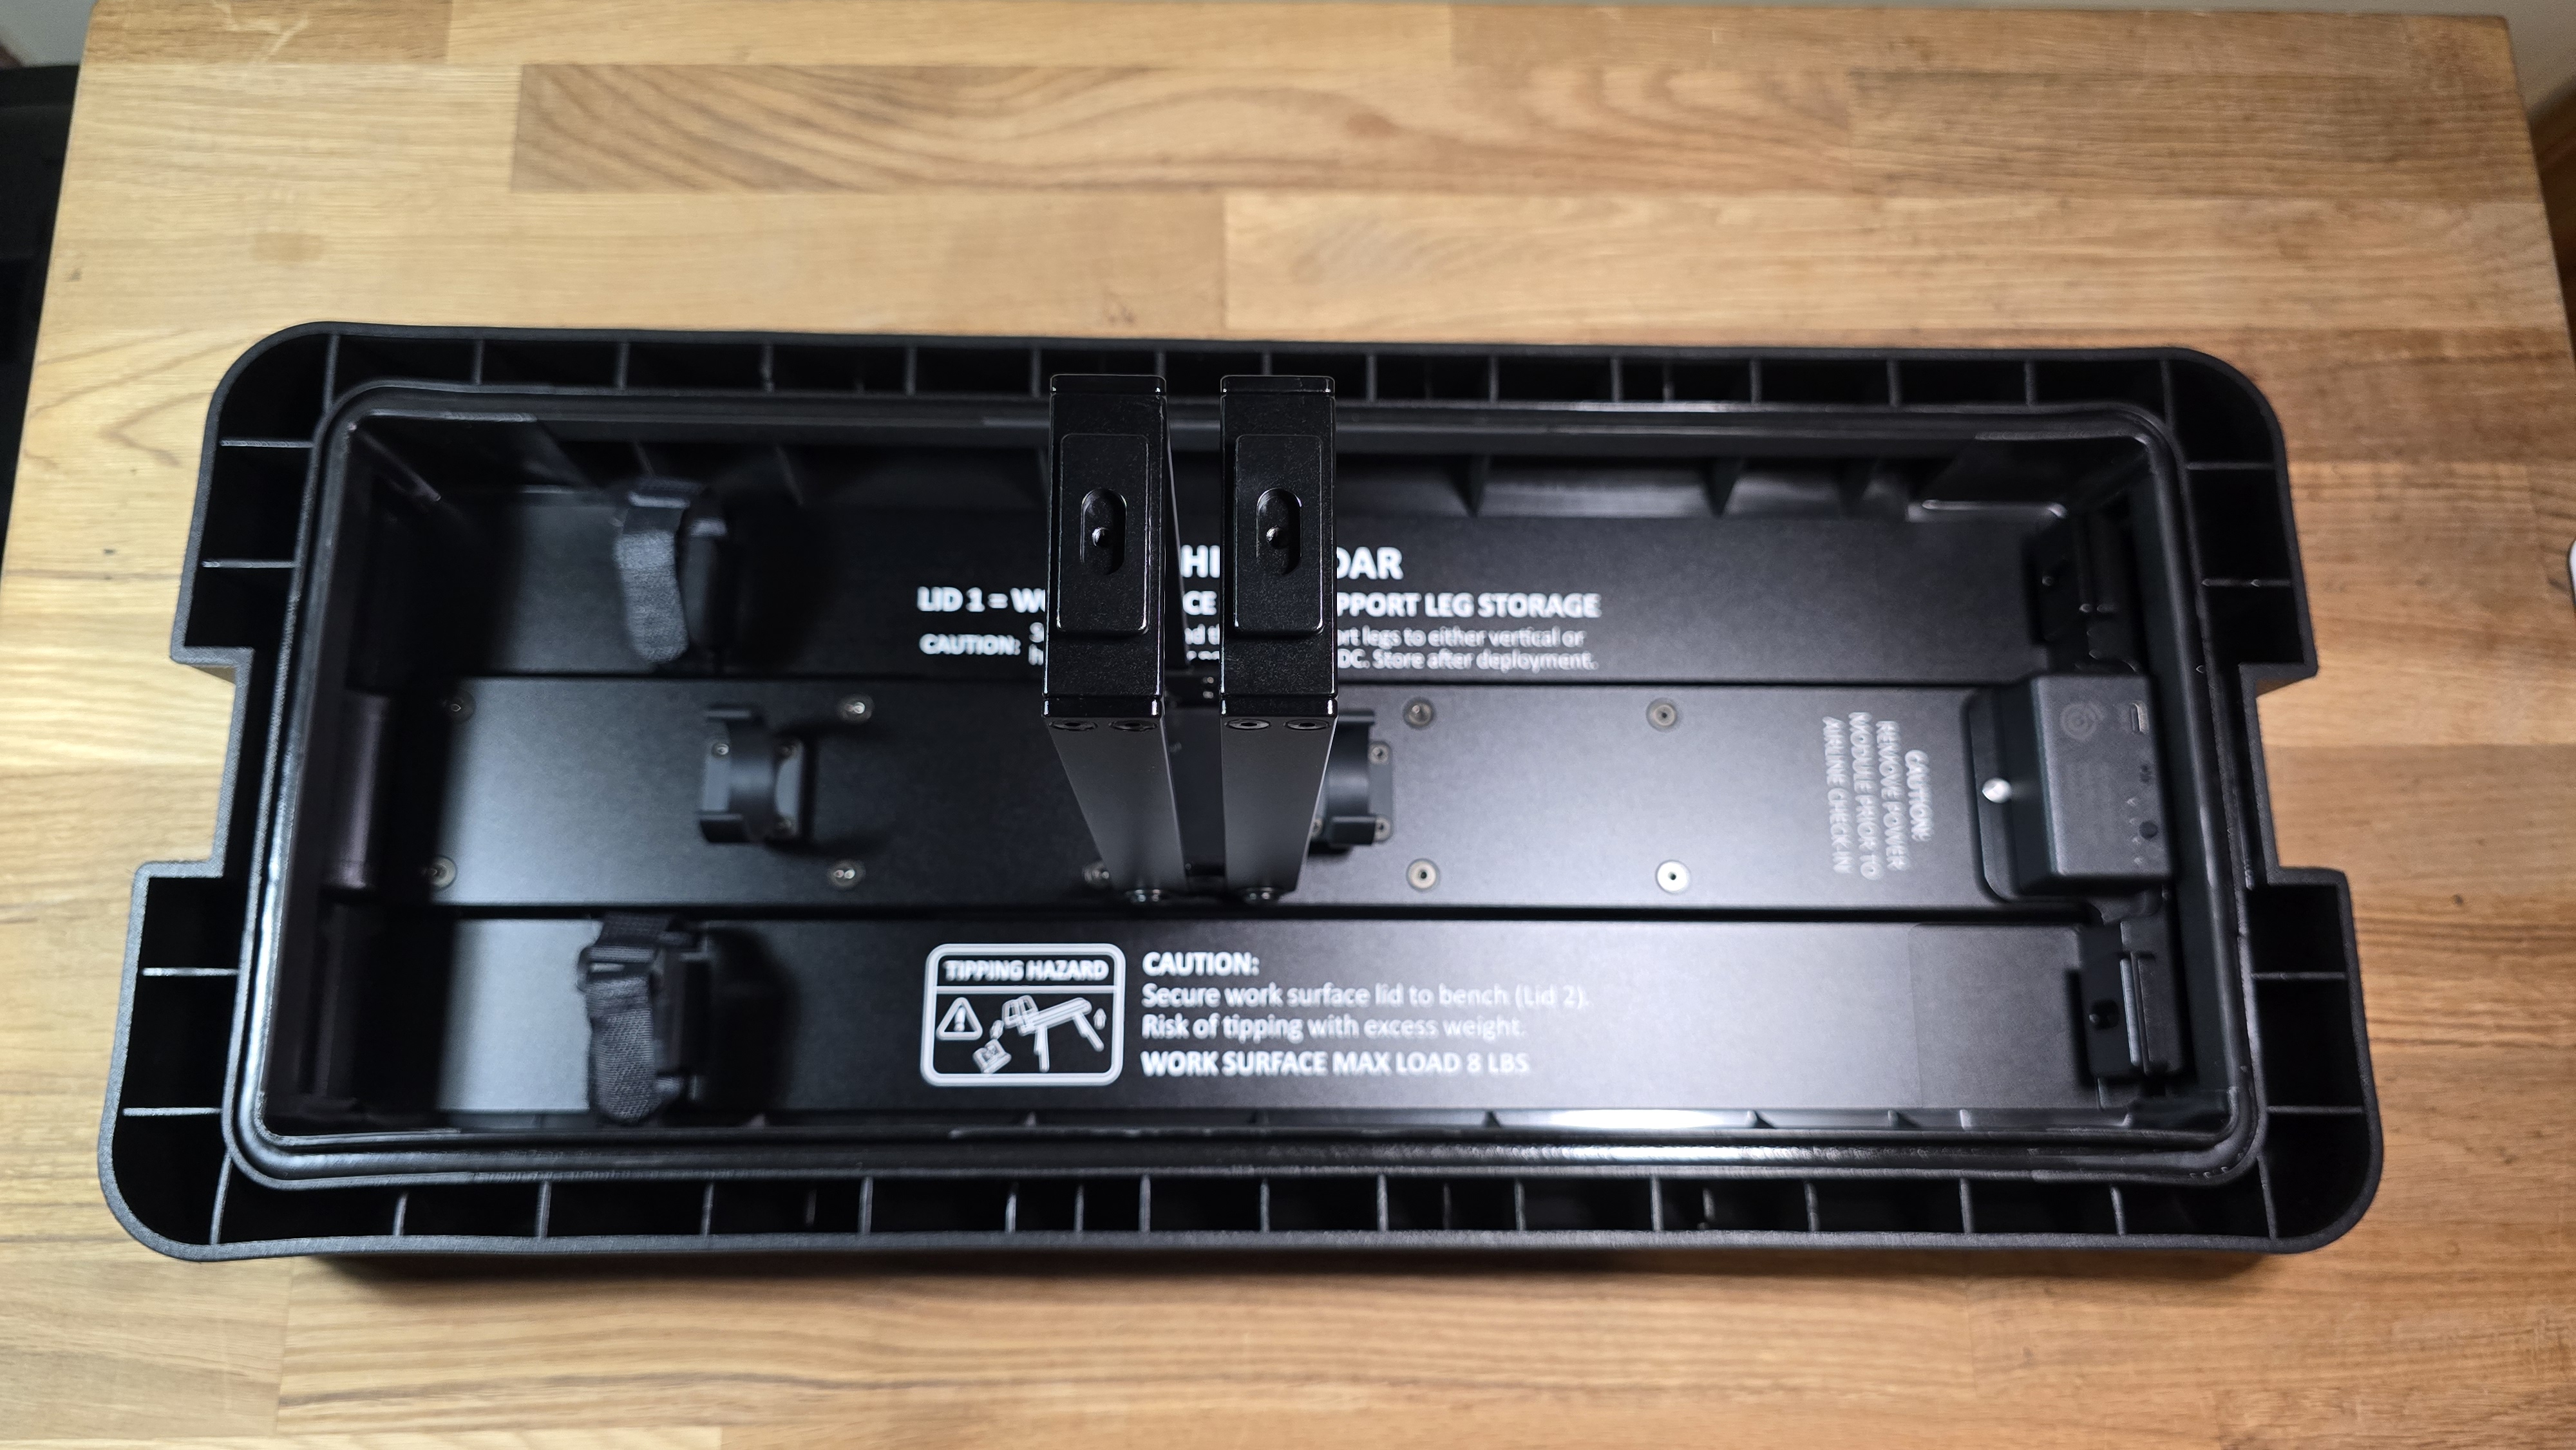
- Using these articulating arms, slide the work surface lid onto the Work Surface Arm channel that you attached previously to the bench
- Make sure that the Arm knob is unscrewed sufficiently
- We recommend placing it so the text orientation of the work surface lid is toward the deployed bench
- Once the articulating arms are inside the channel, tighten the Work Surface Arm knob securely to ensure a stable work surface
Your bench with work surface area is ready to go.
Please always ensure the knobs are tightened before putting weight on the bench and/or work surface.
Weight Limits
⚠️ TIPPING HAZARD - Keep items centered on work surface.
| Configuration | Maximum Load | Usage |
|---|---|---|
| Lid A (work surface) | 8 lbs | Light equipment only - CENTER placement required |
| Lid B (bench - sitting) | 220 lbs | Sitting ONLY - no standing |
| Bench with work surface (extended) | 8 lbs on work surface | Combined setup for field work - CENTER placement required |
Troubleshooting
Leg won't lock in place:
- Ensure locking knob is facing inward
- Verify leg is centered on anchor point
- Tighten knob fully - it should be snug
Adapter won't click into place:
- Check orientation - may be upside down
- Ensure triangular mechanism is fully opened
- Apply gentle pressure while sliding
Bench with work surface feels unstable:
- Verify all four connection points are tight
- Check that bench legs are on level surface
- Ensure locking knobs are fully tightened
Safety Reminders
✅ Always verify legs are centered and locked before placing weight on EDC
✅ Bench configuration: Sitting only - DO NOT stand on bench
✅ Check stability after assembly - give it a gentle shake test
✅ Collapse and secure legs in the lids before moving EDC
5. Disassembly and Storage
When you need to pack up the EDC for transport or storage, simply reverse the deployment steps:
Disassembly order:
- If work surface is deployed, remove it from the bench (reverse Section 4 steps)
- Remove bench legs from Lid 2 (reverse Section 3 steps)
- Remove EDC elevation legs from hardcase (reverse Section 2 steps)
Storage tips:
- Store each leg set in its corresponding lid for easy identification
- Look for the text labels inside each lid indicating which legs belong there
- EDC legs → store in Lid 1 (marked "EDC")
- Bench legs → store in Lid 2 (marked "BENCH")
This ensures you can quickly identify the correct legs for your next deployment.
Next Steps
After deploying legs, proceed to:
👉 Gateway Deployment - Mount wireless gateway on telescoping pole
👉 Positioning - Learn optimal placement and clearances