PDU Configuration
Configure the smart power distribution unit for monitoring and remote control.
⏱️ Time Required: 5 minutes (basic check) | 10 minutes (full setup)
Overview
Your EDC includes an EnGenius cloud-managed smart PDU (Power Distribution Unit) that:
Model:
- North America (120V): EnGenius ECP106
- International (210-240V): EnGenius ECP106-INT
Features:
- 6 individually controlled outlets for internal components
- Real-time power monitoring with LCD display
- Remote control capability (optional, via cloud)
- Surge protection and overload protection
Power Input:
- North America: Standard NEMA 5-15 plug (3-prong)
- International: IEC C14 inlet on PDU itself
Location: Rear panel of the EDC, integrated with power inlet
[IMAGE: PDU location on rear panel with LCD display visible]
For Most Users: Monitor and Go
The PDU comes pre-configured and is already powering your system. For basic use, just check the display.
Quick Status Check (1 minute):
-
Look at the PDU LCD display on the rear panel
-
Check the readings:
- Volts (V): Should match your local power (120V or 220-240V)
- Amps (A): Current draw (typically 2-8A depending on workload)
- Watts (W): Total power consumption (typically 200-800W)
- Status: Should show "Normal" or green indicator
[IMAGE: PDU LCD display showing normal operating status]
- Verify all LED indicators are green/normal:
- No red or flashing warning lights
- All outlets showing active
✅ Everything looks normal? You're done!
👉 Continue to Connecting Devices
The PDU can be managed when connected to the Cloud or Standalone.
Option A: Cloud Management
Configure with EnGenius Cloud
Step 1: Connecting to Ethernet
Connect the Ethernet cable from the EnGenius Switch directly to the DHCP-enabled network and make sure the PDU can reach the Internet.
Step2: Register Device
You can register the device on the EnGenius Cloud platform.
EnGenius Cloud Platform
- Log into the EnGenius Cloud Platform: https://cloud.engenius.ai/.
- Go to the home > Inventory page and click "Register Device".
- Enter the Serial Number of the device(s) for device registration. Please refer to "User Manual-Registering Devices to Organization".

4. Select the registered device and click "Assign to Network" to add the device to your designated Network.
Troubleshooting
If your PDU device cannot be managed by the EnGenius Cloud Platform, there might be a problem with connecting to EnGenius Cloud.
To troubleshoot the connection issue, you may log in to the PDU Local Web (optionB)page:
- Make sure that your host system has same layer-2 network as the PDU. By default, the computer should get the IP address in this segment 192.168.10.x.
- Under your web browser, enter the URL: http://192.168.10.80 to access the PDU's local status page web interface.
- You can review the device status after logging into the PDU with the default admin account/password (admin/admin).
- Check the information on the Device Status and take action if necessary.
Option B: Standalone Configuration
Option B: Standalone Configuration
Step 1: Access to Local Web
-
Connect your computer to the switch and ensure its IP address is in the same subnet.
-
Launch your web browser and enter the URL: http://192.168.10.80 to access the PDU's local web GUI.

-
Use the default login credential (ID/PWD: admin/admin) to log in to the PDU's local web page.\


Step2: Configure and Manage the Device
After logging in to the device's local web page, navigate to the left-side menu to configure and manage the PDU accordingly.

LCD Panel
The LCD panel on the front of the PDU allows you to quickly access information about the PDU and its outlets. When you power on the PDU for the first time, the EnGenius logo will appear, followed by a QR code. You can scan the QR code to access the PDU quick start guide.

To access the Home page, long press the bottom of the control buttons beside the LCD panel. The Home page shows the current PDU usage, including the usage percentage, wattage, electric current, and voltage. The usage percentage is divided into four levels to indicate the overall power consumption status:
- Green: Low usage.
- Orange: Moderate high usage.
- Red: High usage.
- Dark red: Critical usage.

You can check the usage of each outlet by pressing the upper control button. Pressing the upper control button again will show the usage of the next outlet. The following screenshot shows the Outlet 6 details of an EnGenius switch (the model name is ECS1008P) that is plugged into the PDU.

The next time you power on the LCD panel, the Home page will be displayed automatically.
Using the LCD Panel
See below for how to use the LCD panel.

| Callout | Description |
|---|---|
| 1 | Status icons |
| 2 | PDU information |
| 3 | Action icon |
| 4 | Action icon |
| 5 | Control Button for Callout 3 |
| 6 | Control Button for Callout 4 |
- The function of the upper and lower control buttons depends on the corresponding icon shown on the screen.
- Long-pressing the upper control button functions as a Go Back command.
- Long-pressing the lower control button takes you to the Home page.

Understanding the Different Icons
See below for the different icon definitions.

Navigating the Menu
To access the Menu, complete the following steps:
- Go to the Home page.
- Press the lower control button.
To navigate through the options, use the upper control button, which functions as the Next button. To view the details of a selected topic, use the lower control button as the Enter button. In some cases, you may need to drill down further to view more specific details.
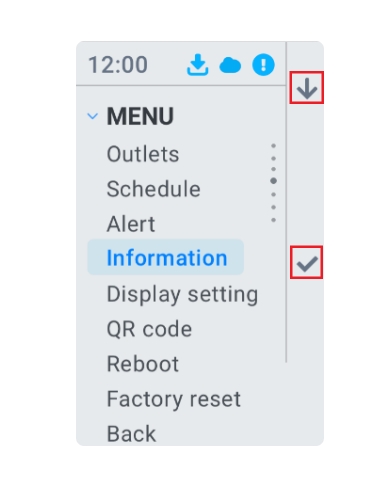
Full Menu List
The following shows the available options displayed on the Menu.
Depending on the model, the options displayed on the Menu might be different.
Outlets
Displays the following information when an Outlet is selected.
Press Menu > Outlets > (Select an outlet).

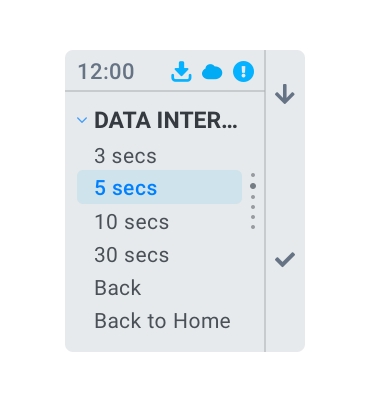
- Peak Data: Recorded the highest current and power usage over a specific time interval.

- Data Interval: Frequency at which the PDU collects and reports power/current usage information. This information is used to create the line charts in Peak Data.
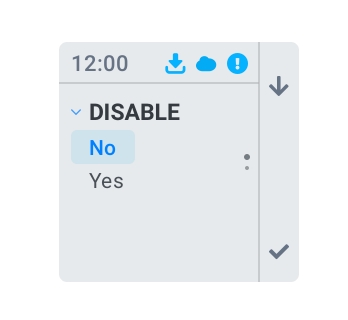
- Enable: Enables the outlet, so outlet is able to provide power to the connected device.

- Disable: Disables the outlet, so the outlet will be powered off.
- Reset: This will temporarily disable and enable the outlets.

Schedule
Displays the power on / power off/ reset time on the schedule for each outlet.
Press Menu > Schedule

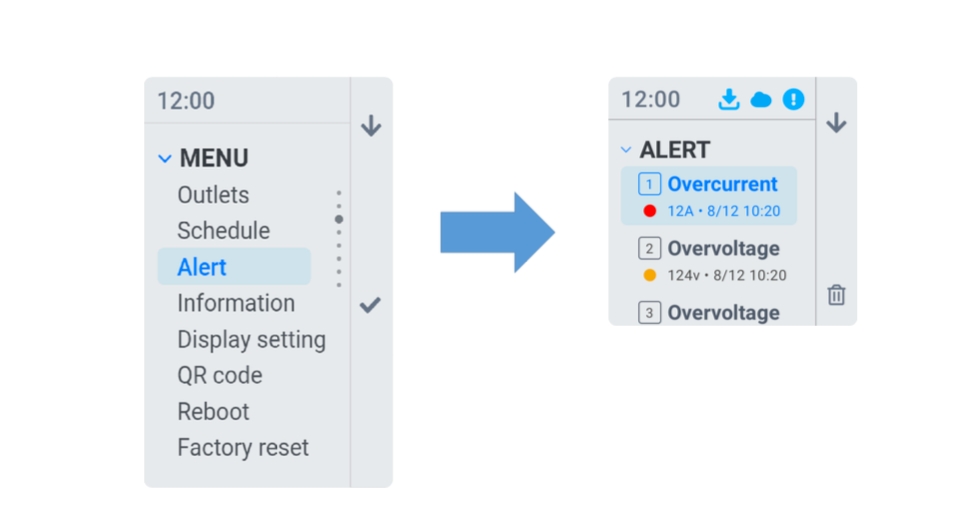
Alert
Displays the alert message for each outlet.
Press Menu > Alert
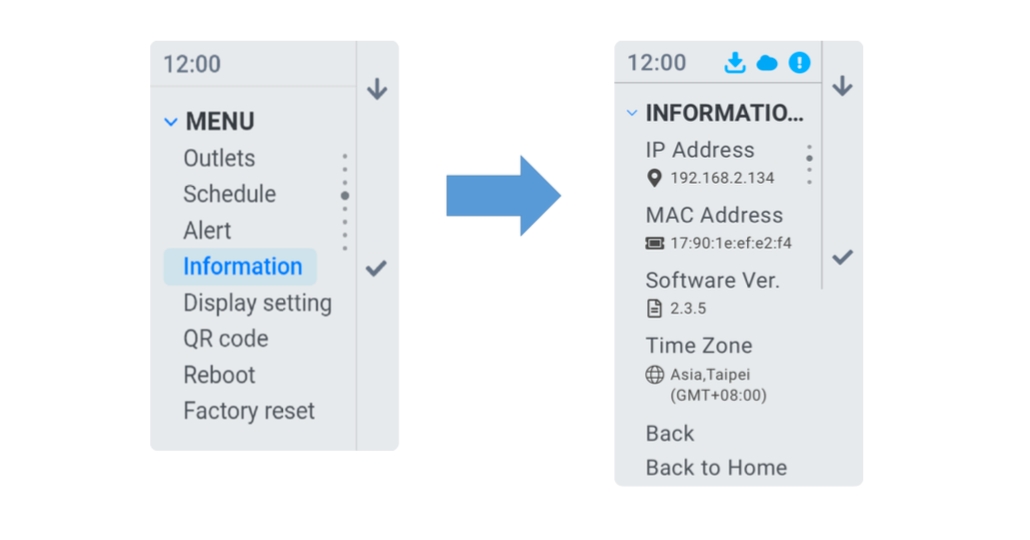
Information
Displays the PDU details, which include the IP address, MAC address, software version, and time zone.
Press Menu > Information
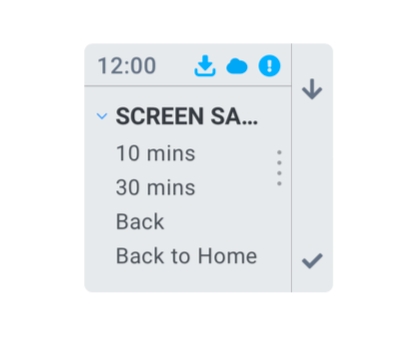
Display Settings
Displays the following configurable display settings:
Press Menu > Display Settings
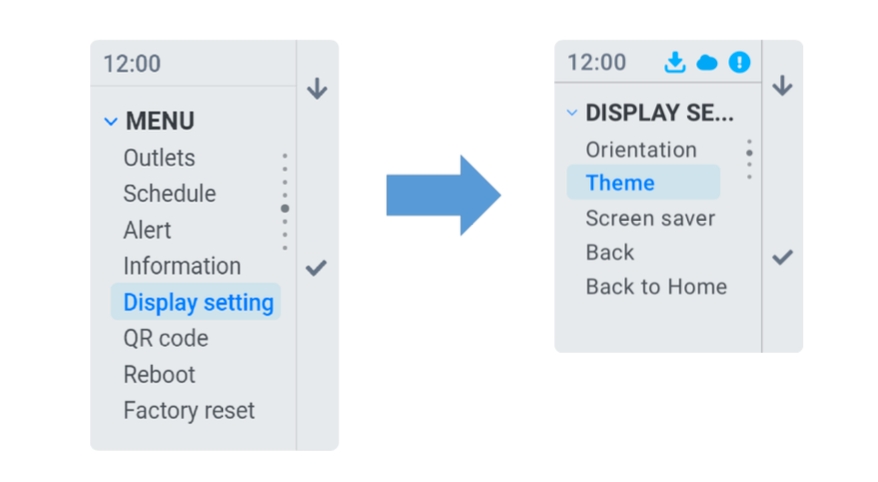
- Orientation: Configures the content on the screen to be presented in a horizontal or vertical orientation.

- Theme: Choose between a dark or light theme for the content display.

- Screen saver: the idle time that the LCD will turn off.
QR Code
Displays the QR code to view the PDU quick start guide or product web page.
Press Menu > QR Code

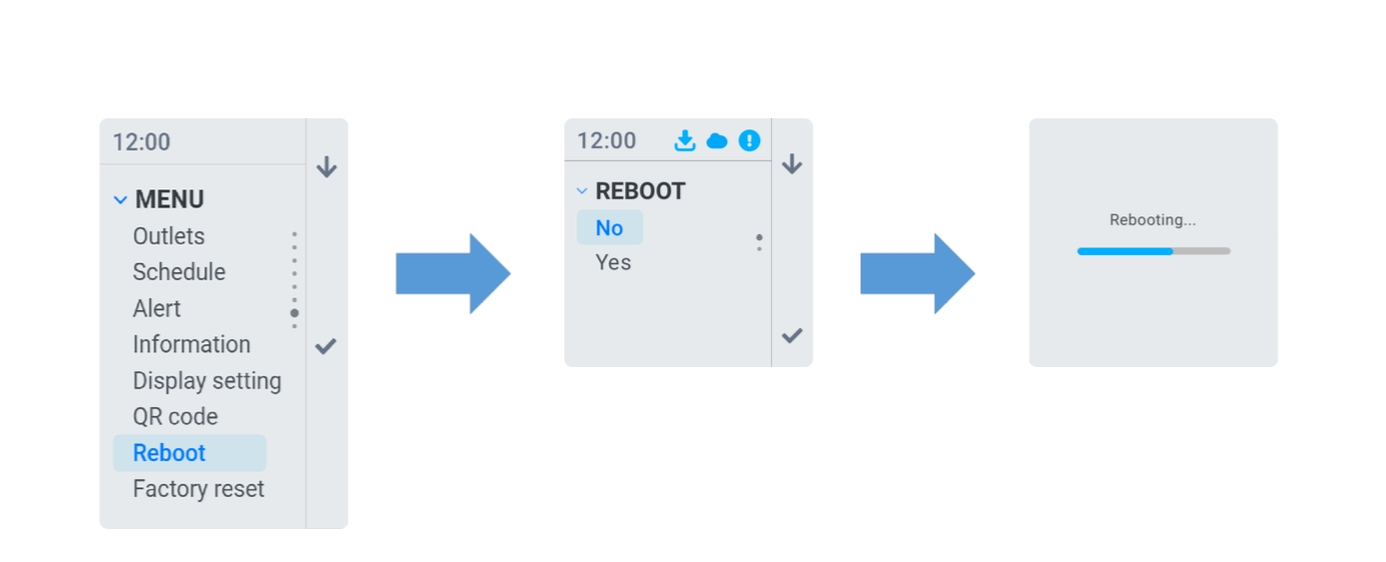
Reboot
Reboots the PDU. The outlets still provide power during a PDU reboot.
Press Menu > Reboot
Factory Reset
The PDU will be restored to its default settings, and all the data will be deleted. The power supply will be temporarily interrupted until the reset process is completed.
Press Menu > Factory Reset

Internal Power Distribution Reference
For complete power distribution diagrams and outlet assignments:
👉 Wiring Diagrams - Power distribution and connectivity reference
These diagrams show:
- Which PDU outlets power which components
- Power cable routing and labeling
- Available outlets for expansion
- Edition-specific power configurations
EnGenius Official Documentation
For advanced features and detailed information:
📚 EnGenius Resources:
- EnGenius Cloud Portal - Cloud management
- EnGenius Support Center - Manuals and guides
PDU Model Documentation:
For North America (ECP106):
- Product Page: EnGenius ECP106
- Quick Start Guide: ECP106 QSG
- User Manual, Datasheets available on product page
For International (ECP106-INT):
- Product Page: EnGenius ECP106-INT
- Quick Start Guide: ECP106-INT QSG
- Datasheet: ECP106-INT DS
- User Manual available on product page
For technical support:
- EnGenius Technical Support: support@engeniustech.com
- Or contact HiveRadar Support: support@hiveradar.com
Need More Help with the PDU?
For EnGenius PDU-specific issues (hardware failure, firmware problems, advanced features):
Option 1: Contact HiveRadar Support
- Email: support@hiveradar.com
- We'll create a support ticket with EnGenius on your behalf
Option 2: Contact EnGenius Directly
- EnGenius Support: support@engeniustech.com
- Visit: EnGenius Support Center
For EDC setup or configuration help:
- Contact your HiveRadar reseller/partner for assistance
What's Next?
After verifying your PDU is working correctly:
👉 Connecting Devices - Connect your equipment and services
👉 Advanced Networking - Optional advanced features
Hardware: EnGenius Cloud-Managed Smart PDU (model TBD)